




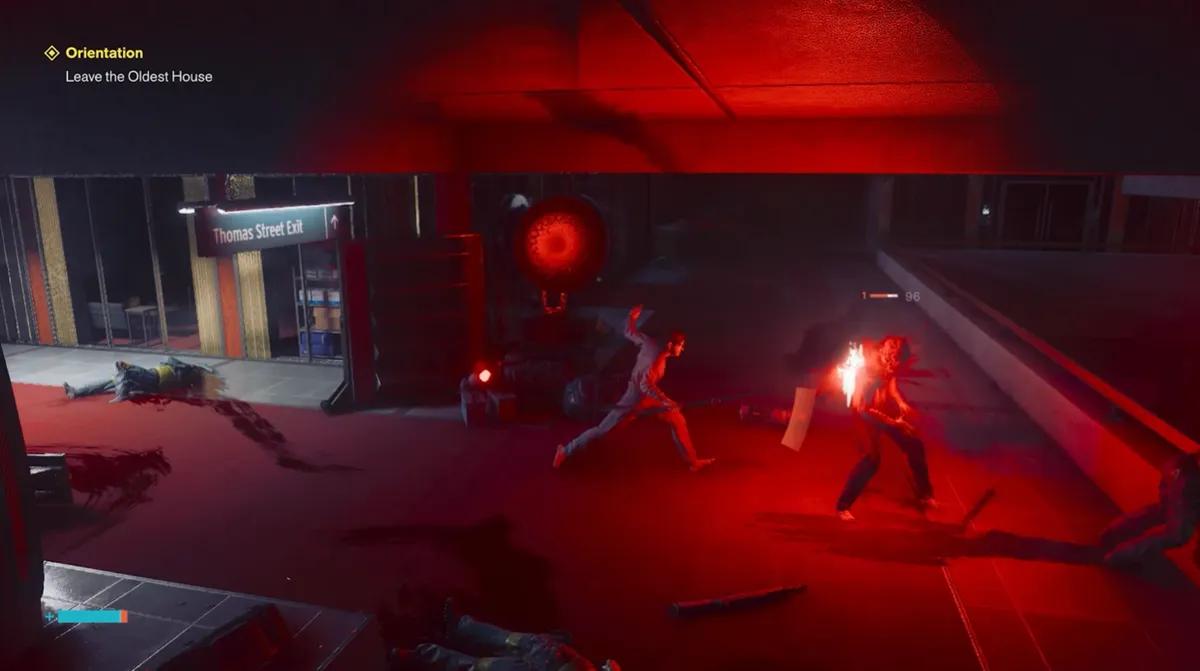
Genomgång av kontrollresonansorientering: Alla mål och hur man slår artisten
”Orientation” är det inledande uppdraget i Control Resonant, och här får du fatta tre beslut som gäller för resten av spelet: en primär Aberrant-form, en sekundär Aberrant-form och en stridsförmåga. Uppdraget avslutas dessutom med ”The Artist”, en boss vars dödligaste attack kan avbrytas helt om du vet var du ska stå. Allt nedan täcker hela rutten, samlarobjekten längs vägen och själva striden.
Översikt över uppdraget ”Orientation”
Orientering inleder kapitlet ”Wake Up” och sträcker sig från Dylan Fadens cell i Oldest House ut i ett förstört Manhattan. Det finns inga krav utöver att starta spelet.
Kapitel | Wake Up |
Startplats | Downtown, Oldest House |
Krav | Inga, detta är det första uppdraget |
Boss | Konstnären |
Låser upp | Välkommen till Manhattan, Gap, Dubbelhopp, Elevate, Rush |
Belöningar | Oanvända märken 11–60, 1 återställningsföremål, 1 levande skärva, 1 000 eller 2 000 källor |
För den fullständiga uppdragsordningen för alla tre kedjorna, se Control Resonant Walkthrough Hub.
Alla orienteringsmål

Uppdragsloggen delar upp Orientering i åtta steg. Listan nedan följer ordningen i spelet, och avsnitten därefter beskriver vart och ett av stegen närmare.
- Lämna det äldsta huset
- Träffa Zoe vid hotellbyggnaden
- Undersök gränden
- Leta efter Jesse
- Genomför ritualen
- Hitta en utsiktspunkt
- Nå källan till mönstret
- Besegra konstnären
Två formval och ett förmågeval ligger mellan dessa steg snarare än inom dem, vilket är anledningen till att genomgången behandlar dem som egna avsnitt.
Vakna upp och välj din primära avvikande form

Uppdraget inleds sju år efter det första spelet, med Jesse Faden som kör in en metallstång i bröstet på sin medvetslösa bror. Dylan vaknar upp i en tom version av sin cell med en ensam obelisk i fjärran. Gå mot den, stanna när spelet avbryter dig för styrelsens dialog, och håll sedan ned F eller vänster bumper vid obelisken för att vakna.
Du ombeds omedelbart att välja en primär Aberrant-form. Detta är det vapen du kommer att använda oftast, och valet är permanent så snart du lämnar Gap senare i uppdraget.
Form | Skada | Hastighet | Anmärkningar |
|---|---|---|---|
Slag | 30–60 | Snabb | Den enda formen med kritisk träffchans, på 30 % |
Glaive | 70–90 | Medel | Lång räckvidd, träffar flera fiender och trycker tillbaka dem |
Klyvning | 65 | Medel | Fast skada, träffar hårdare bakifrån |
Strike passar spelare som vill rusa in, avfyra en skur och börja om. Glaive är det bästa valet för att kontrollera folkmassor tack vare dess räckvidd och knockback. Cleave är allroundvalet, och dess bonus för bakhugg skalar med en uppgradering som du kan köpa senare. Ingen av de tre är en fälla, och senare uppgraderingar täcker deras svaga punkter.
Lämna det äldsta huset

Kolla det lilla bordet utanför Dylans cell efter två samlarobjekt, och gå sedan genom dubbeldörrarna med det gröna ljuset. Korridoren delar sig: ”Prime Candidate Training” till höger ligger bakom ett lås på nivå 18 som du inte kommer att ha på länge, så ta dörren åt motsatt håll mot ”Central Executive”.
Ta dig igenom säkerhetskontrollen till en stängd grind. I rummet till vänster finns ett samlarobjekt, och i rummet på andra sidan finns en terminal med en stor röd knapp som öppnar grinden. Sök igenom bordet mittemot terminalen innan du går vidare.
Det är värt att ta sig igenom nästa rum i lugn takt. På ett skrivbord mot den stora pelaren finns ett samlarobjekt, och i Safe Room med det starka vita ljuset finns ytterligare ett samt en resurslåda med Aberrant Slivers och Source. Aberrant Slivers används för vapenuppgraderingar, och Source är spelets valuta som används hos försäljarna.
Ta hissen ner och gå in i Central Executive.
Besegra Hiss-fienderna i Central Executive

Hissarna här är de svagaste fienderna i spelet och dör efter några träffar. Attackera med X, fyrkant eller vänster musknapp. Rensa den nedre våningen, klättra uppför trappan och gå åt vänster.
De flesta dörrarna på övervåningen kräver behörighetsnivå 1 eller 2, vilket du inte får förrän i uppdraget ”Welcome to Manhattan”, men du kan se resurslådor och samlarobjekt bakom flera av dem. Lägg märke till området och återvänd efter nästa uppdrag.
Den andra Hiss-vågen lär dig att undvika, vilket är ditt försvarsdrag och din ersättning för sprint utanför strid tills Rush låses upp. Den tredje lär dig om hälsoelement, de små blå kulorna som faller när du dödar fiender. Att plocka upp dem är det enda pålitliga sättet att läka sig på i Orientation.
Innan den sista sträckan öppnar du dörren under den stora FBC-emblemet. I Jesses kontor finns fyra samlarobjekt på skrivbordet, i bokhyllan och på soffan. Följ sedan korridoren, ta hissen ner genom lobbyn och interagera med den trasiga barriären för att gå ut.
Träffa Zoe vid hotellbyggnaden

Dylan landar i ett Manhattan fullt av Hiss-besatta kroppar som svävar i luften. Dra ner en för att ta en radio, så möter du specialagent Zoe de Vera, som pekar mot en vit hotellbyggnad i fjärran.
Du har ingen karta ännu, så du får navigera visuellt. Hotellet ligger söder om Oldest House. Följ gatan mot vraket, bekämpa Hiss vid korsningen, sväng sedan höger och fortsätt. När vägen inte längre går att gå på och svänger uppåt mot himlen, sväng vänster och följ gränden söderut.
Det är också här spelet börjar placera intressanta platser, markerade med en vit ögonikon. Titta på en och håll ned knappen för att öppna kommunikationshjulet, håll sedan markören på alternativet tills mätaren fylls. Rapportering är valfritt och förändrar ingenting mekaniskt, men det fyller i detaljer om världen och låser senare i spelet upp sidouppdrag.
Gränden utlöser ditt första arenamöte. Barriärer spärrar av området tills alla tunga fiender är döda. Drönare återuppstår så länge en tung fiende lever, så döda de tunga fienderna först och samla hälsokulor från drönarna endast när du behöver dem. När du klarar det får du 1x Distorted Form och Source.
Välj din sekundära avvikande form

Det andra valet är långsammare och tyngre än det första, och det tillämpar Falter, den gula bedövningsmätaren under en fiendes hälsa.
Form | Skada | Falter | Anmärkningar |
|---|---|---|---|
Kross | 127–222 Stump | 21–42 | Laddningsbar hammare, stark mot sköldar |
Borr | 95–280 Vass | 0–21 | Kan laddas, bäst mot mjuka mål |
Förlängning | 63–127 Rå | 0–21 | Lång räckvidd, träffar flera mål, ingen fördel vad gäller skadetyp |
Välj något som kompletterar det som din primära attack saknar. Den snabba och kortdistansbaserade Strike passar bra ihop med Crush för snabb skada eller Extend för räckvidd. En annan faktor att ta hänsyn till är skadetyp: bepansrade fiender senare i spelet är svaga mot Blunt, vilket gör Crush till det smidigaste valet om du är osäker.
En andra arenamatch startar så fort du har valt, så du får testa det direkt. Därefter fortsätter du söderut, hoppar över staketet och tar dig över byggnaderna förbi den vita skåpbilen. Klättra uppför trappan, sväng vänster upp på den låga byggnaden, korsa taket och använd Dodge mitt i luften för att ta dig över gapet. Följ taklinjen, sväng vänster vid graffitiväggen och ta gatan söderut till avsatsen där Zoe väntar.
Hennes konversation bekräftar att klyftan som delar Manhattan är en Altered World Event, och att AWE är fientlig mot Hiss snarare än allierad med den. Dialogalternativen här är bara för stämningens skull, även om vissa av dem ger extra bakgrundsinformation. Om du väljer ”Måste hitta direktören” frågar Zoe efter Trench, vilket avslöjar att hon befann sig utanför Oldest House före händelserna i det första spelet.
Undersök gränden och leta efter Jesse

Följ Zoe in i gränden längs ett spår av frysta duvor. Gränden slutar vid ett fall som hon inte kan klara. Hoppa över räcket ner på taket långt nedanför, och fortsätt sedan hoppa norrut från tak till tak, med sikte på de orange upplysta byggnaderna.
En syn av Jesse dyker upp halvvägs. Efter det går du till takkanten, letar reda på det orange upplysta taket nedanför och hoppar ner dit. Duvorna strömmar in genom ett krossat fönster ovanför dörren, och dörrarna öppnas när du närmar dig.
Inne i byggnaden går du nerför trappan till ett mörkt utrymme med en betonggång och en plattform med gul växtlighet. I mitten står en CRT-tv bredvid en retrokonsol. Interagera med tv:n.
Slutför ritualen
Detta förflyttar dig till mellanvärlden, ett svart tomrum med bärnstensfärgade plattformar. Avsnittet är en handledning i att ta sig fram, och varje TV ger dig en förmåga.
- Följ den gyllene stigen till avsatsen ovanför parkeringsplatsen och interagera med Jesse. Hon och Dylan byter kort plats med varandra.
- Dubbelhopp låses upp när nya plattformar dyker upp. Hoppa, och hoppa sedan igen.
- Nästa TV ger dig förmågan ”Elevate”. Hoppa och håll ned hoppknappen för att sväva över klyftor.
- TV:n efter det ger dig ”Rush”, en kort sprint som lämnar efterbilder och bygger upp fart för längre hopp.
Tunneln med rörliga föremål efter ”Rush” är den enda delen av detta avsnitt där du kan dö. Vänta tills den öppnas och använd sedan ”Rush” hela vägen utan att stanna. Om du är långsammare blir du krossad och skickas tillbaka till tunnelns början.
Ytterligare två TV-apparater följer, var och en omgiven av julprylar som fyller ut utrymmet medan du rör dig framåt. Den sista utlöser mellansekvensen där Dylan och Jesse försöker stänga Fault tillsammans men misslyckas. Jesse berättar för honom att något redan har läckt ut i staden.
Detta avslutar ritualen och ger dig ett videosamlarobjekt, ”I Have to Go”, som arkiveras under Jesse Faden i arkiven.
Hitta en utsiktspunkt och nå källan till mönstret

Spring längs stigen förbi den sista TV:n för att lämna byggnaden. Zoe tar kontakt och ber Dylan att titta på den våg som staden projicerar.
Korsa klyftorna västerut med hjälp av dina nya förmågor. Ett Arena-möte blockerar vägen, så ta hand om Heavies. Bortom det blinkar en fläck av djuprött ljus till när du närmar dig och Hiss-kropparna faller ner från himlen – det är Mönstret som dödar dem, inte något du har gjort.
Fortsätt västerut till en byggnad som flankeras av högre byggnader. Klättra upp på de lägre byggnaderna bakom dem för att nå taken, och ta dig sedan över till konstgalleriet med speglar. Utställningen tillhör en konstnär vid namn Cassia Nomura. Gå längst bak och interagera med spegeldörren.
Hur man besegrar konstnären

Typ | Resonant Entity, första bossen |
Arena | Cirkulär, uppbyggd av gator och fordon |
Faser | En övergång, utlöses vid den blå sfären på hälsofältet |
Hot | Kastade föremål, svep på nära håll |
Belöning | Oanvända märken 11–60, 1 återställningsföremål, 1 levande skärva, 1 000 eller 2 000 Källa |
The Artist är den övre halvan av ett enormt huvud som glider runt i arenan och kastar staden mot dig. De blå kulorna på hennes hälsofält markerar punkter där hon släpper Health Elements, så behandla dem som gratis läkningspunkter snarare än skademål.
Taxikast. Hon lyfter en taxi och slänger iväg den. Spring fram för att locka kastet mot din tidigare position, eller undvik när den når dig. Efter fasövergången kastar hon två.
Trafikljus. På nära håll svingar hon klumpar av trafikljus som batonger. Hålls de vertikalt innebär det ett slag nedåt, så undvik dem när de börjar röra sig. Hålls de horisontellt innebär det ett brett svep, så hoppa och attackera hennes ansikte, vilket håller dig i luften mellan de två svängarna.
Cement Volley. En horisontell rad av cementklumpar som avfyras i två vågor. Hoppa över den första, undvik den andra och minska avståndet mellan dem.
Föremålsbeskjutning. Strömmar av skräp från avstånd. Närma dig i vinkel istället för rakt framifrån.
Striden vänder när ungefär 30 % av hennes hälsa är borta, vid den blå sfären. Hon flyger upp, undersidan av hennes huvud lyser gult, och hon omger sig med svävande bitar av gatan innan hon avfyrar dem alla mot dig. Denna eldstorm är mycket svår att överleva, och lösningen är att aldrig låta den ta slut.
I samma ögonblick som hon stiger upp, leta efter moln av jord på marken. Om du står på ett sådant lyfts du upp på en asfaltsplatta. När den är högst upp i sin båge, gör ett dubbelhopp och använd Elevate för att landa på hennes huvud och träffa den lysande delen under. Detta avbryter attacken, orsakar stor skada och lämnar henne bedövad, vilket ger dig ett fönster för att straffa henne.
Efteråt lägger hon till stenras längs den väg hon glider över, så sluta jaga henne rakt fram och ta en genväg istället. Allt annat upprepas. När prompten dyker upp ovanför hennes huvud, tryck på den för avrättningen.
Vilken stridsförmåga du ska välja
Gå fram till hennes lik och håll ned F eller vänster bumper för att välja din första stridsförmåga. Dessa förbrukar kraft, som du bygger upp genom att träffa saker.
Förmåga | Skada | Kraftkostnad | Bäst för |
|---|---|---|---|
Salva | 60–180 trubbigt, 12–36 vackla | 400 | Skada mot ett mål på avstånd |
Volatile Anomaly | 150–350 Trubbig explosion, upp till 180 Falter | 300, plus 120 för att kasta | Explosionsskada, skalar i takt med att dess hälsa minskar |
Sköld | 100 trubbigt, 60 vackling vid slag | 150, plus 180 vid slag | Försvar och en rammattack |
Barrage och Volatile Anomaly passar spelstilar på avstånd. Skölden låser din Aberrant medan den hålls, men Shield Bash förvandlar dig till en murbräcka och blir betydligt bättre med uppgraderingar. Alla tre är trubbiga, vilket är viktigt eftersom bepansrade fiender dyker upp två uppdrag senare och trubbiga attacker är det som tar bort pansar.
Efter att du har valt släpps du in i ett träningsutrymme för att öva, och sedan in i Gap. Gap är din knutpunkt för uppgraderingar, talanger och artefakter, och det är den sista platsen där du kan återställa dina formval innan de låses. Du når det när som helst genom att hålla ned på styrknappen eller G på tangentbordet.
Alla samlarobjekt i Orientation
Samlarobjekt | Var du hittar det |
|---|---|
Ett foto av Dylan och Jesse | Litet bord utanför Dylans cell |
Anteckningar om det vanliga AWE-ärendet | Samma bord |
Läkarintyg | Rummet med det gröna ljuset, till vänster om den stängda grinden |
Ett memo om Dylan Faden | Bord mittemot grindterminalen |
Klagomål | Skrivbordet mot den stora pelaren |
Anteckning från säkerhetsvakt | Köja inne i skyddsrummet |
Dimensional Research: Reparation av rutschbanor | Jesses kontor |
Jesses ID-kort | Jesses kontor |
Ett brev från Emily Pope till direktören | Jesses kontor |
Jesses anteckningar till sig själv | Jesses kontor |
Jag måste gå | Belöning för att ha fullbordat ritualen |
En fantastisk möjlighet | Video med Dr. Darling, spelas upp före eftertexterna |
I säkerhetsrummet finns också uppdragets resurslåda. Allt i arkiven är sorterat efter typ, och nya poster är markerade med en röd triangel.
Belöningar för orienteringen

Om du besegrar konstnären får du Untapped-märket 11-60-artefakt, 1 återställningsföremål, 1 levande skärva och en källa. Källorna är oeniga om mängden källor och anger antingen 1 000 eller 2 000, så betrakta den exakta siffran som obekräftad tills du ser den dyka upp.
Märket är en artefakt, vilket innebär att det ger en förstärkning när det är utrustat. Vissa artefakter har en nackdel vid sidan av förstärkningen, så läs den fullständiga beskrivningen innan du sätter in en.
Vanliga misstag
Att betrakta undvikande som valfritt. Det finns ingen blockering i Control Resonant. Undvikande är hela ditt försvarsarsenal tills du får Shield, om du väljer det.
Att dra sig tillbaka för att läka. Hälsa får du bara genom att döda fiender och plocka upp orberna. Att dra sig tillbaka i en arenastrid gör din situation värre, inte bättre.
Att döda drönare först. De återuppstår oändligt länge så länge en Heavy lever. Döda Heavies, använd drönare för att läka.
Att jaga Artisten efter hennes fasövergång. Stenar faller på den linje hon rör sig längs. Rör dig i sidled och avskär henne.
Att missa asfaltslyften. Dammmolnen dyker bara upp medan hon är i luften. Om du använder den tiden till att springa iväg får du ta emot hela eldstörmen.
Vad man ska göra härnäst
Orienteringen avslutas med att Emily Pope, som nu är tillförordnad meddirektör tillsammans med Simon Arish, förklarar mönstret och de resonanta entiteterna som det skapar. Hon skickar Dylan efter fler av dem och utser West Incursion Zone som utgångspunkt.
Nästa uppdrag är ”Control Resonant Welcome to Manhattan Walkthrough”, som inleder kapitlet ”Contain the Crisis”, låser upp kartan och ger dig ett nyckelkort på nivå 1.


 Det har lyckligt kopierats... Tack för att du delar vårt innehåll!:



5% insättningsbonus upp till 100 ädelstenar

0% avgifter på insättningar och uttag.





11% insättningsbonus + FreeSpin


EXTRA 10% INSÄTTNINGSBONUS + GRATIS 2 HJULSPINN

Gratis case och 100% välkomstbonus


5 gratisfodral, daglig gratis & bonus

3 gratis casinos och en bonus på 5% på alla kontantinsättningar.

+5% till insättning




Kommentarer