




Kontrollresonant Välkommen till Manhattan-genomgång: Alla mål och nivå 1-nyckelkortet
 PlayStation
 Xbox
Xbox Steam
Steam”Welcome to Manhattan” förvandlar Control Resonant från en korridor till en öppen stad och låser upp kartan, snabbrese, zonuppgradering och talangträdet. Det avslutas med nyckelkortet på nivå 1, som öppnar upp en stor del av innehållet som du redan har passerat, och introducerar den laddningsbaserade mekaniken som spelet bygger på under de kommande tjugo timmarna.
Översikt över uppdraget ”Välkommen till Manhattan”
Detta är det första uppdraget i kapitlet ”Contain the Crisis” och det andra i kampanjen. Dylan arbetar nu för FBC under Zoe, med en mobil inneslutningsenhet fäst vid skallen som säkerhetsåtgärd.
Kapitel | ”Contain the Crisis” |
Startplats | Centrum, Oldest House |
Krav | Slutför orienteringen |
Namngiven fiende | William, Hiss Riveter Apex |
Låser upp | Evakueringsprocedurer, kedjan ”Besegra Resonanter”, Kartläggning av New New York |
Belöningar | 1 levande skärva, nyckelkort nivå 1 |
Den fullständiga kampanjordningen för alla tre uppdragskedjorna finns i genomgångshubben för Control Resonant. Om du hoppade över inledningsuppdraget täcker genomgången av Control Resonant Orientation striden mot Artist och de två valen av Aberrant-form som avgör allt här.
Alla mål i ”Welcome to Manhattan”

Uppdragsloggen delar upp detta uppdrag i tio steg.
- Lämna det äldsta huset
- Hjälp till med kartläggningspylon
- Hitta underhållsarbetaren
- Hitta ett sätt att återställa strömmen
- Flytta laddningen till den centrala kontrollpunkten
- Slå på strömmen till den centrala kontrollpunkten
- Besegra Hiss
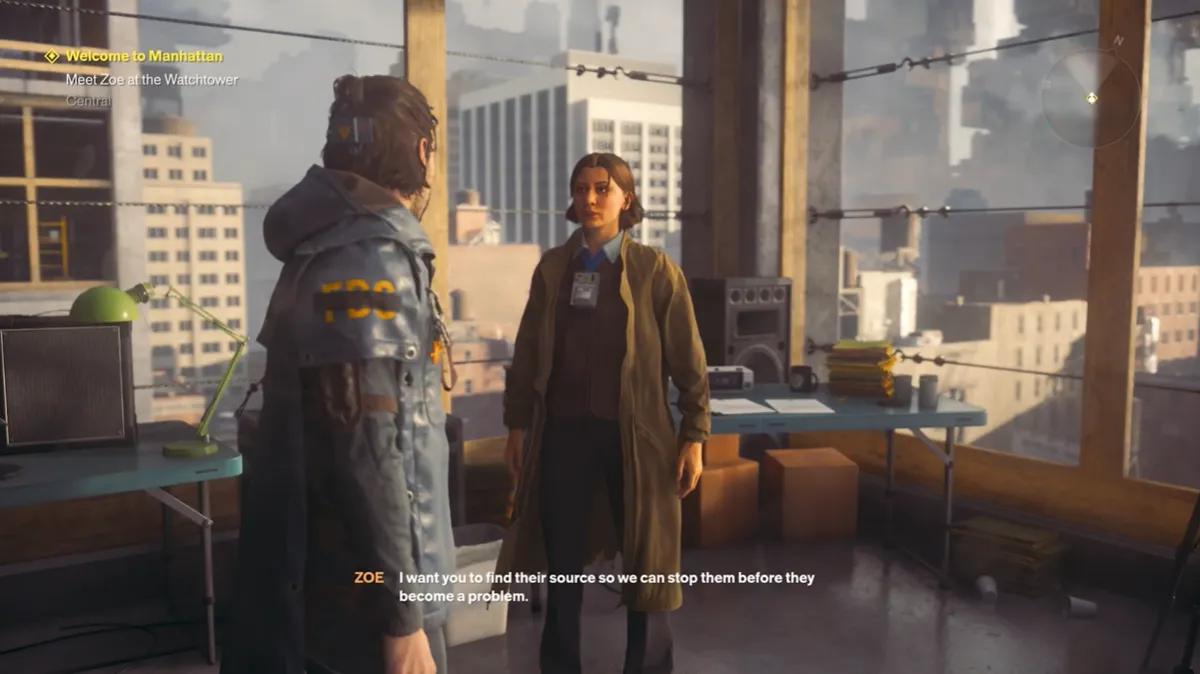
- Träffa Zoe vid vakttornet
- Rensa försörjningsvägen
- Skaffa ett säkerhetskort
Lämna det äldsta huset

Innan du går ut finns det två saker inne i det äldsta huset som är värda en avstickare.
Emily Pope står nära ingången och får nya dialoger varje gång berättelsen går vidare, vilket markeras med en röd triangel ovanför hennes interaktionsikon. Om du pratar med henne mellan uppdragen slipper du gå tillbaka senare.
Garderoben är den blå lådan mot väggen som lyser upp ett klädställ. Där förvaras alla kläder och frisyrer du samlar in, uppdelade i ytterplagg, underkläder, accessoarer, hår, ansiktshår samt kropp och ansikte, med färgalternativ för hår och vissa kläder.
När du är klar går du genom dörröppningen förbi det stora FBC-logotypen. När du kliver ut namnges din zon, Downtown, och Zoe förklarar upplägget via radion.
Hjälp med kartpylonerna

Din karta är tom förutom en uppdragsmarkör, och kartläggningspylonerna fyller i den zon för zon.
Gå söderut förbi de stora portarna till ett öppet område med din första orienteringspunkt. Aktivera den, hitta sedan hissen på sidan av byggnaden, dra i spaken som lyser grönt för att få ner den och åk upp med den, eftersom pylonet ligger på ett tak istället för på gatunivå.
Tre sensorer måste vara aktiva innan den centrala kartläggningspylon fungerar, och den första finns på detta tak. Aktivera den och leta sedan söderut efter en man som håller en grön signalraket och som pekar dig i riktning mot sin kollega vid själva pylon. Om du tappar bort de återstående sensorerna pekar parabolerna på det stora tornet mot de mindre.
Andra sensorn. Från kartpylon, titta norrut mot byggnaden med en röd tegelvägg ovanför taket och vit graffiti. Den sitter i takets hörn.
Tredje sensorn. Från det södra hörnet av pylonbyggnaden tittar du sydost mot basketplanen på taket.
På basketplanen finns också en dörr för snabbförflyttning. Aktivera den för att stabilisera den, vilket gör den till en destination som du kan återvända till från vilken annan dörr som helst. Deras kartikoner ser ut som pilar som pekar uppåt in i en dörröppning.
När alla tre är aktiva, återvänd till Pylon och aktivera den för kartan över Downtown. Detta startar också sidouppdraget ”Mapping the New New York”, som kartlägger varje Pylon i den öppna världen och vanligtvis jämnar ut zonen för en talangpoäng.
Nya system som introduceras i ”Welcome to Manhattan”

Det här uppdraget introducerar de flesta av spelets öppna världssystem redan i början.
Kartkit. Avslöjade zonkartor, med en ikon som ser ut som en liten antenn. Att hitta ett sådant bör vara det första du gör i varje ny zon, och de finns på marken eller på tak.
Orienteringspunkter. Korta pyloner som avger en ljusstråle. När du kommer nära sparas ditt spel- och inventariestatus. Det finns ingen manuell sparning i Control Resonant, så dessa är dina enda checkpoints.
Dörrar för snabbresor. En per större plats, aktiveras vid kontakt.
Zon-XP och zonnivåer. Allt du slutför i en zon fyller dess XP-mätare. När du går upp i nivå låser du upp förmågor som hälsoelementförstärkningar, Source-droppar och kläder, samt får en talangpoäng – vilket är den främsta anledningen att ta en omväg för sidouppdrag istället för att bara rusa rakt mot målen.
Talangpoäng. Används vid Gap genom att interagera med stenhögen. Talanger skalar närstridsskada och Falter eller uppgraderar förmågor som Rush. Dominance är det kloka första valet, eftersom det samlar flera stridsfördelar i ett enda köp.
Radiosvar. En radioikon med en blå tidscirkel dyker upp under samtal. Det är valfritt att svara, tystnad är ett giltigt svar och inget av detta påverkar utfallet.
Fiendernas nivåer och Build Power. Fienderna har en nivå angiven i en diamantikons bredvid sin hälsofält. Grått betyder lätt, ett rött tal på svart bakgrund är ett steg upp, rött på rött betyder problem och en dödskalle betyder att du bör komma tillbaka senare. Din sida av myntet är Build Power, som visas under Stats and Effects i Loadout-menyn och höjs genom Talents, nya Aberrant-former och formuppgraderingar. Om ett uppdrag känns omöjligt går det snabbare att höja Build Power än att kämpa sig igenom flera försök.
Hitta underhållsarbetaren

Zoe vill ha Dylan vid vakttornet, men den centrala kontrollpunkten är strömlös och ingenjören som skickades för att fixa den, Baker, har slutat rapportera in.
Öppna kartan och leta efter sökområdet vid en korsning sydöst om kartstolpen. Tak, gator eller en blandning av båda fungerar, men på gatorna finns butiker som är värda att besöka för resurslådor, samlarobjekt, sidouppdrag och pussel – allt som ger zon-XP. Räkna med att möta Hiss ledda av Heavies vid korsningen, och aktivera orienteringspunkten där innan striden om du kan.
Följ gatan österut till återvändsgränden. Mittemot en skåpbil står en hopfällbar stol med en lapp från Baker, där han tydligt uttrycker sina känslor kring att arbeta med Dylan och meddelar att han har gått iväg för att fixa strömmen på egen hand.
Rapportera till Zoe och fortsätt sedan österut till borden och datorerna. På ett upplyst bord bredvid en skrivmaskin ligger ”Power Core Servicing Diagram”, en handritad instruktion vars kortfattade version går ut på att leda strömmen från punkt 1 till punkt 5, den centrala kontrollpunkten. Den kan läsas igen under Arkiv, Samlarobjekt, FBC-logistik. När du lämnar den påpekar styrelsen att Aberranten kan leda elektrisk ström.
Flytta laddningen till den centrala kontrollpunkten

När du träffar en laddad Power Core överförs strömmen till ditt vapen. Den avtar snabbt, så detta är en stafett: ta tag, spring, lämna av. Om du tappar laddningen återställs den till den senast aktiva kärnan istället för till startpunkten.
Sex kraftkärnstationer finns inom uppdragets gränser, markerade med batteriikoner. Laddade kärnor surrar och lyser vitt, inaktiva pulserar rött.
Etapp ett. Från anteckningsbordet, leta nära hörnet i slutet av gatan efter den laddade kärnan. Träffa den, spring till korsningen och placera laddningen vid pylonkärnan.
Etapp två. Nästa inaktiva kärna finns i en gränd nordväst. Ta laddningen, spring västerut och sväng höger in i öppningen i byggnadsställningen med den gröna presenningen. När du laddar den kärnan öppnas en lucka, och blodspåret därinne leder till Bakers kropp. Rapportera det till Zoe och ta sedan resurslådan i byggnaden.
Etapp tre, till Station 1. Ta laddningen och bege dig nordost, men stanna innan gränden. Golvet där är täckt av något köttigt som sprutar ut taggar när du står på det. Du kan springa över, men du kan inte stanna. Den snabbare vägen går förbi det helt: Gör ett dubbelhopp upp på byggnadsställningen till vänster, hoppa till hissen på andra sidan gränden och klättra sedan över byggnaderna till kärnan på taket.
Etapp fyra. Leta norrut efter en taklös betongbyggnad, hoppa ner från ovan och ladda kärnan i mitten bredvid några FBC-rangers som inte är särskilt glada över larmet som utlöses.
Etapp fem, till Station 2. Ta först den stora resurslådan i närheten: från kraftkärnan hoppar du upp på metallskåpet vid den norra väggen, klättrar upp och hoppar till nästa tak. Lådor märkta med en tecknad glassmaskot ger en hälsouppgraderingspoäng, och tre av dem förlänger din hälsobar. Ta sedan laddningen, spring genom dörröppningen ut på gatan i nordväst, sväng höger och följ gatan till kärnan framför den centrala kontrollpunkten.
Besegra Hiss vid kontrollpunkten

När du aktiverar kontrollpunkten utlöses omedelbart en arenastrid med två tunga fiender som du inte har sett tidigare.
Hiss i fokus. En flygande fiende som rusar fram och avfyrar en energistråle, vars ankomst förvarnas av en ofarlig siktlaser. Döda dessa först, eftersom strålen kommer att träffa dig medan du är upptagen med annat. Du kan också placera andra Hiss mellan dig och den och låta strålen göra jobbet åt dig. Skölden blockerar strålen, men bara så länge din kraft räcker.
Hiss-förföljaren. En snabb närstrids-Heavy som snabbt minskar avståndet. Spring förbi dess attacker och slå till bakifrån, bort från klorna.
Ta kål på dem båda för att öppna kontrollpunkten.
Möt Zoe vid vakttornet

Ta någon av zonernas åtkomstpunkter bredvid checkpointens stora dörr, dra i spaken vid det gröna ljuset och åk upp med hissen. Följ stigen runt till åtkomstpunkterna på den bortre sidan och hoppa ner i schaktet. Förbi FBC:s lagerområde och en orienteringspunkt ligger vakttornet, i den centrala zonen, med Zoes kontor genom dörren till höger om fönstren.
Zoe redogör för stadens zonstruktur: det äldsta huset i centrum, vakttornet i Centralzonen, evakueringszonen i öster och den västra intrångszonen i väster. Hon uppmärksammar en möjlig resonantentitet i väster, vilket startar uppdragskedjan ”Besegra resonanter”, och avslöjar att meddirektör Arish försvann när han undersökte en mönstrad plats. Hon ger dig sedan en hissknyckel till de underjordiska försörjningsledningarna, vilket låser upp ”Evakueringsprocedurer”, även om du inte kan påbörja det förrän detta uppdrag är avslutat.
Lämna inte kontoret än. Fönstret bakom Zoe innehåller fyra intressanta platser, och att rapportera dem är det billigaste sättet att låsa upp sidouppdrag i spelet.
- Verconn-kontoret, byggnaden med det röda lövlogotypen mittemot Watchtower, ger endast bakgrundsinformation
- ”Strange Chimney” låser upp sidouppdraget ”The Central Resonant”
- ”Distant Area” till höger om skorstenen låser upp ”The Park Resonant”
- ”Patterned Lights” till vänster om Verconn-kontoret fyller i den västra incursionszonen
Det krävs inte alla Resonant-enheter, men var och en ger ytterligare en stridsförmåga, vilket är den enskilt viktigaste faktorn för hur svårt resten av spelet känns.
Rensa försörjningsvägen

Aktivera först dörren för snabbresor, i rummet mittemot Zoes kontor till höger om ingången.
Följ sedan stigen till höger till fönsterhörnet och hoppa ner genom det gulbelysta hålet i golvet. Nedanför finns en resurslåda och en garderob. Lås upp dörren i hörnet, gå igenom den, sväng vänster förbi den stora skylten vid fönstren och använd Zoes nyckel på hissen. En orienteringspunkt väntar längst ner med samlarobjektet Statusförfrågan bredvid.
Följ korridoren in i kammaren med tegelpelare, där det finns ett Power Core-pussel med två belöningar.
Börja med den valfria först. Hoppa ner på golvet, slå på den aktiva kraftkärnan, spring åt höger till en avsats, hoppa upp och ladda den inaktiva kärnan där. Bakom dörren som öppnas finns en stor resurslåda formad som staplade tegelstenar, som ger en kraftuppgraderingspoäng. Tre sådana höjer din kraftpool.
Sedan vägen vidare. Ladda upp igen och spring norrut till den låsta dörren på den övre nivån, i hörnet ovanför stapeln med vita lådor. När du laddar den kärnan öppnas vägen framåt.
Bortom dörren och en orienteringspunkt ligger en rangerkropp som du kan rapportera. Fortsätt framåt och rensa bort Hiss och Heavies tills du når ett rödbelyst rum med tre svävande kroppar. När du rapporterar dessa får du Zoes anteckning om att rangerna var tungt beväpnade, vilket innebär att det som dödade dem var ännu värre. Den låsta dörren till kraftkärnan här kommer snart att spela en viktig roll.
Hur man besegrar William

Nästa rum är en arenastrid mot en namngiven fiende.
Typ | Hiss Riveter Apex, flygande miniboss |
Attack | Explosiva projektiler som kastas, orsakar brännskador |
Svaghet | Luftattacker från en vinkel |
Prioritet | Döda honom före de andra Heavies |
William kastar sprängämnen som fyller brännskademätaren på din HUD. När den når maxnivån fattar du eld och måste springa för att släcka den. Han flyger, så markattacker har väldigt liten effekt: hoppa på honom från en vinkel och träffa honom i luften, upprepade gånger, trots hans stora hälsoreserv. Döda honom innan du ger dig på de andra Heavies, eftersom han gör mer skada än alla de andra och är den enda du inte kan ignorera när du ompositionerar dig.
Namngivna fiender som William dyker upp genom hela spelet som svårare versioner av standardenheter. Hans arkivpost finns under Fiender, Hiss-forskning, som Hiss Riveter Apex.
Lås upp genvägen till vakttornet
Tar två minuter. Från bottenvåningen i Williams arena, hitta den aktiva kraftkärnan, ta laddningen och klättra uppför avsatserna till dörröppningen i hörnet. Följ korridoren, sväng höger vid rangers och ladda kärnan till den låsta dörren. Korridoren bortom den öppnar en andra dörr tillbaka till den första orienteringspunkten för försörjningsvägen, vilket ger dig en direkt väg till vakttornet.
En resurslåda finns också längs gångbron efter arenan, bakom en dörr med ett gult ljus, i slutet av en slingrande korridor.
Skaffa ett säkerhetskort

Följ skylten FBC FIELD OFFICE till tunnelbaneperrongen och ta sedan trappan längst bort från ingången.
Det finns två lådor som är värda att ta med sig. Om du svänger vänster på perrongen och följer de södra trapporna kommer du till ett rum med en resurslåda vid några bord, och i ett sidorum nära den grönt upplysta utgångsdörren finns en stor resurslåda värd 1 hälsouppgraderingspoäng.
Gå uppför trappan till ytan. Zoe vill nu att du går till fältkontoret för att hämta ett säkerhetskort, men det kompliceras av att Arish är den enda som har behörighet att utfärda ett sådant och han antas vara död.
Aktivera orienteringspunkten vid korsningen och följ sedan skyltarna runt hörnet längs vägen till en säkerhetsstation, där vakten vägrar släppa igenom Dylan. Oavsett om du argumenterar eller låter Zoe sköta det blir resultatet detsamma: hon ringer till vakthuset och vakterna ger efter.
Förbi kontrollpunkten förklarar Zoe att planen är att Dylan helt enkelt ska ta ett kort. Passera nästa orienteringspunkt till den öppna ytan utanför kontoret, där fältsjukhuset och säkerhetsstationen förblir låsta tills du har kortet.
Aktivera den centrala kartstolpen först. Den sitter ovanpå den stora orangea säkerhetsstationen, tillsammans med fältkontorets snabbresedörr och den samlingsbara ShenyangIMC-dörren (AI2294-UE).
Från hörnet som vetter mot fältkontoret ska du titta österut efter två sensorer, en på en blå byggnad och en på en orange byggnad nära kontoret. Från hörnet bredvid den ska du titta norrut efter den tredje på en annan blå byggnad. Aktivera alla tre, återvänd till pylon och slå på den för att få fram kartan över Central Zone. Gå sedan in i fältkontoret genom ytterdörren och ta nyckelkortet från bordet i mitten.
Välkommen till Manhattan-belöningar
När du slutför uppdraget belönas du med 1 levande skärva och nyckelkortet för nivå 1. Säkerhetsbehörighet på nivå 1 öppnar alla dörrar med en matchande skylt, inklusive flera som du gick förbi i Central Executive under inledningsuppdraget.
Vanliga misstag
Att gå med laddningen istället för att springa med den. Nedräkningstiden är kort. Spring mellan varje kärna.
Att gå in i gränden med taggarna. Golvet avger eld om du stannar eller saktar ner. Ännu bättre är att ta ställningen över den.
Att hoppa över rapporterna vid Watchtower-fönstret. Två Resonant-sidouppdrag och en zon som låses upp, för trettio sekunder av stillastående.
Att lämna snabbresedörrarna oaktiverade. Tre dyker upp här: vid basketplanen, vakttornet och fältkontoret. Att missa dem innebär betydligt mer gående i de kommande två uppdragen.
Vad du ska göra härnäst
Världen är helt öppen när du har tagit nyckelkortet, så både sidouppdrag och Resonant-varelser är tillgängliga nu. Nästa uppdrag är ”Control Resonant Evacuation Procedures Walkthrough”, som skickar dig in i evakueringszonen efter källan till skakningarna och avslutas med nyckelkortet för nivå 2. Med behörighet för nivå 1 i handen är det också värt att gå tillbaka genom Downtown och Central för att öppna de dörrar du inte kunde öppna tidigare.


 Det har lyckligt kopierats... Tack för att du delar vårt innehåll!:



5% insättningsbonus upp till 100 ädelstenar

0% avgifter på insättningar och uttag.





11% insättningsbonus + FreeSpin


EXTRA 10% INSÄTTNINGSBONUS + GRATIS 2 HJULSPINN

Gratis case och 100% välkomstbonus


5 gratisfodral, daglig gratis & bonus

3 gratis casinos och en bonus på 5% på alla kontantinsättningar.

+5% till insättning




Kommentarer