


Final Fantasy Resonance Kapitel 1 Genomgång: Earth Shrine, Belmodar och attacken mot Grandshelt


 Square Enix
 Fantasy
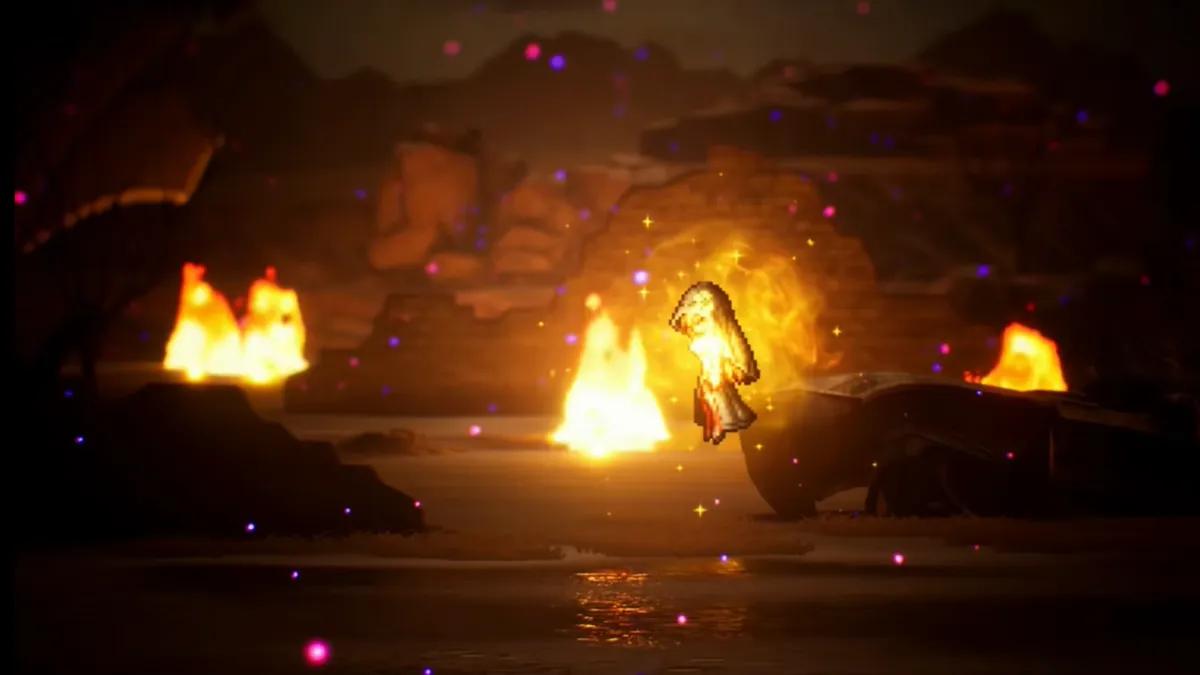
Chapter 1 of Final Fantasy Resonance opens twice. The first opening drops you onto a burning battlefield as a woman called the Archwitch, who outclasses everything in front of her and loses anyway. The second opening is Rain's first assignment as Commander of the Airship Squadron, centuries later, and it goes about as badly. This part of the walkthrough covers the prologue, the Earth Shrine, the town of Mitra and the attack on Grandshelt Castle.
Tailing the Truth Quest Overview
Chapter 1 is called Tailing the Truth, and it functions as the game's extended tutorial. Most of its systems get introduced in the prologue and then taken away from you five minutes later.
Chapter | Chapter 1: Tailing the Truth (first half) |
Starting location | Prologue battlefield, then Grandshelt Castle |
Main objectives | Investigate the Earth Shrine, travel to Mitra, defend Grandshelt Castle |
Bosses | Belmodar, Hell's Rider and 3 x Dark Skeletons, Umbra (scripted loss) |
Visions unlocked | Leah, Tronn |
Permanent buffs | One dialogue choice at the Earth Shrine entrance |
Ends with | The council at the Grandshelt Inn after Umbra's attack |
Two of the three named fights in this half can be lost. The third cannot be won, which the game does not tell you until your party is on the floor. The full chapter list and the order the story runs in sit in the Final Fantasy Resonance Walkthrough: All Chapters hub.
Plan for a long sitting. This half contains two dungeons, one town and two Overworld crossings, and fast travel is not available for any of it. Everything described below follows the main path, so side content such as Sub-Quests gets mentioned only where it blocks progress.
How to Beat the Three Prologue Tutorial Battles

The prologue puts you in control of the Archwitch on a battlefield in the distant past. Work through the movement and mini-map prompts, then follow the stone path forward until a group of soldiers blocks the way.
Tutorial Battle 1 is two Soldiers at Level 30 and a Shock Trooper at Level 33. None of them have an elemental weakness or a resistance, and none of them drop anything. The game uses this fight to teach Turn Order, which runs along the marquee at the top of the screen and shows whose turn comes next. The marquee stays on screen for every fight in the game, so get used to checking it now. Follow the prompts and hit all three with the Archwitch's whip. Her stats are far beyond anything on the field, so the fight exists for you to find the buttons rather than to threaten you.
Head up the stairs afterward. A cutscene shows two young mages pinned down by soldiers, the Archwitch cutting the soldiers down, and then a second wave riding Magitek machines who kill the mages anyway.
Tutorial Battle 2 is two Magitek Armor at Level 30 and a Cutting Edge Magitek Weapon at Level 35. The Magitek Armor units are weak to Thunder. This is where the game explains how elemental weaknesses work: enemies hide them until you land a hit of the right element, and once you do, a broken shield icon appears beside that enemy's Affinities on screen. Until then it is trial and error.
The same fight introduces Multicasting, which lets one attack hit several targets at once with the damage spread across them. It works on healing too, so the Archwitch can top up a whole party in one cast, though each member gets far less than a single-target heal would give them.
Magitek Armor opens with Flamethrower. On your turn, open Skills and pick Thundaga, which is the only option not greyed out. One cast kills the first unit. Repeat on the second, and its weakness icon is now visible because you have already hit it with Thunder.
The Cutting Edge Magitek Weapon arrives next, and Thundaga will not be enough. The game teaches Limit Bursts here. Each character has a Limit Gauge that fills as they use basic attacks and skills, and emptying it unleashes their strongest move. Follow the prompt to fire the Archwitch's Chaotic Convergence and the Level 35 machine goes down in one animation.

Continue up the stone path and exit right. In the next area, take the path right and then north to find a Level 40 Iron Giant, which is also weak to Thunder.
Tutorial Battle 3 is that Iron Giant, alone, against the Archwitch, alone. No party, no backup. Physical attacks do not move its health bar enough to matter, so open Skills and use Thundaga from the opening turn.
After two turns the game prompts the Esper tutorial. Select Summon Esper and then Bahamut. He lands, counters the Iron Giant's sword swing with Blaze before you get control back, and then holds its attention for the rest of the fight. Keep casting Thundaga while it is distracted. Two turns later Bahamut fires Megaflare and what is left of the Iron Giant's health disappears with it.
Espers do not come back for a long stretch after this. The first one you earn for yourself arrives at the end of Part 2, so treat the Bahamut summon here as a preview rather than a tool.
The cutscene that follows is the setup for everything after it. The Archwitch meets the Umbra, their leader steps forward, and she refuses to surrender on behalf of herself and the others. He tells her he expected nothing less and that their defeat was already certain. The fight is short and she loses it, and he seals her inside a crystal and calls the war won.
A rift then tears open above the battlefield. Her crystal joins several others and passes through it while the ground below comes apart, and the armored man shouts that they have been betrayed, without saying by whom. The scene cuts from ruins to the bright kingdom of Grandshelt in the present day.
Grandshelt Castle and the Road to the Earth Shrine

The present day starts in the throne room of Grandshelt, where the King gives Rain his first order as the newly appointed Commander of the Airship Squadron. Something has disturbed the Earth Shrine nearby, and the shrine houses the kingdom's Earth Crystal, which is reason enough for the King to send the squadron rather than a patrol.
Leave the throne room and the scene moves to Rain's quarters, where Lasswell mentions a new recruit waiting to be introduced. Leave the office and run left along the hall to a purple magic circle on the floor. That is the game's first Save Point, and every one after it looks the same, so learn to spot the purple glow at a distance.

Head down the stairs. Charlotte is standing halfway down and is worth talking to for the exchange between her and Lasswell, which sets up how much weight she carries later in this part. The rest of the castle is closed off for now, so keep descending until the cutscene with the new recruit plays and the scene cuts to Rain's airship.
On the way to the shrine, Rain and Lasswell spot a run of shooting stars and spend a while arguing about wishes. A spirit then appears on deck and begs them to hurry to the Earth Shrine. Rain takes it seriously, which is the first sign that the disturbance in the report is worse than a disturbance.
Every Dialogue Choice at the Earth Shrine Entrance

Lasswell asks how Rain wants to approach the shrine, and this is the game's first Choice. All three answers hand Rain a permanent stat increase, so there is no wrong pick, only the stat you would rather have:
- "I'll take point. Follow my lead." gives Rain +3 Strength
- "We're only here to check that everything is in order. Be ready to fall back if you sense danger." gives Rain +3 Stamina
- "Cohesion is key. We need to be aware of each other's situations." gives Rain +3 Spirit
Three points of a stat is small in isolation and permanent in practice, which is the only thing that makes the choice worth thinking about. Strength is the pick if Rain is going to carry early damage, since his sword is the party's main source of it until Visions arrive. Stamina is the pick if you intend to run him as the wall, which is where the game eventually pushes him. Spirit matters more once Visions enter the picture and Rain starts carrying Leah.
Control returns afterward and the World Map unlocks for the first time, so take a minute with it before going underground.

Two soldiers are stationed outside the entrance. The one on the left restores the party's health at no cost, and the one on the right runs a small shop. He sells Potions at 100 gil, Smoke Bombs at 300 gil and Tents at 300 gil. A Potion restores 200 HP, a Smoke Bomb lets the party flee any escapable battle, and a Tent fully restores HP and MP when used at a Save Point or out on the field map.
You start the game with 1,000 gil and the party already carries Potions and Tents. One or two Smoke Bombs is the sensible purchase here, because Mitra sells weapons and armor later in this part and those prices matter more.
Save at the Save Point, then run across the area to the right and open the two chests for a Potion and an Ether. Then head inside.
All Earth Shrine Treasure Coffers and the Hidden Room

The entrance hall triggers the Party Menu tutorial. That menu handles equipment, party-wide healing, the Quest list, the Map and System options, and you will be in it constantly.
Random encounters switch on from here, so a fight can start at any point while you are running around. Dire Rats and Steel Bats are the two regulars in the shrine, and both go down to the attacks and skills the prologue taught you.
The game also warns you that friendly fire exists in this game, so check your target before confirming an attack. Mistargeting a party member with a damage skill does exactly what it sounds like.
Battles pay out EXP, Gil and items, and the EXP reward goes up for any character who finishes a fight without taking a single point of damage. That bonus rewards killing things before they act rather than tanking hits, which is the same logic the stagger system runs on. Level ups also unlock new Skills from time to time, so check each character's skill list after a run of fights rather than assuming the kit is static.
The north and west paths are collapsed, so the route through the shrine is fixed and the only real decisions are which detours to take.
Take the right path and head down the stairs, detouring left halfway down for the first coffer. Continue to the bottom, follow the path left, and pivot north at the intersection. Go all the way up, then run right down a narrow path and follow it to its end for the second coffer.
Backtrack across that path to the intersection, go left this time, and climb the stairs to the upper level. Run right, then drop slightly south down a broken ramp into a hidden section of the lower floor. The coffer at the end of it holds the most useful item in the dungeon.
Climb back up the ramp and continue north. Detour right and follow that path through a tunnel into a hidden area, then take the stairs up to find three coffers waiting in a row at the top.
Here is everything the shrine holds:
- 1 x Phoenix Down, down the stairs on the right path, detour left halfway
- Nodachi for Lasswell, at the end of the narrow path north of the intersection
- 2 x Flame Scroll I, at the bottom of the broken ramp in the hidden lower section
- 3 x Potion, 1 x Bulletproof Vest and 400 Gil, in the hidden treasure room, left to right
The Nodachi is a large upgrade for Lasswell at this stage, so equip it before you move on. The Flame Scrolls matter even more, because the boss ahead is weak to Fire and those two scrolls can take out most of its stagger gauge on their own.
Backtrack to the last intersection and head north up the stairs. A cutscene plays on the way, with Rain and Lasswell working through what would happen if the Earth Crystal, or any of the others, were destroyed. Lasswell then points out the large monster parked in front of the Earth Crystal chamber.
Before you approach it, step onto the purple portal on the ground. It is a Teleport point, and it doubles as a Save Point where you can rest with a Tent or warp back to the shrine entrance.
How to Beat Belmodar

Belmodar sits at Level 4, is weak to Fire, and drops 1 x Phoenix Down. Your party moves first.
Rain says it himself at the start: his sword will not get through Belmodar's hide. Physical attacks are close to wasted here, so put Rain on his Fire skill from turn one. Lasswell is the better carrier for the two Flame Scroll I items from the hidden section, and using both early can strip most of the stagger gauge before the boss has done anything meaningful.
Belmodar opens with Slam. After that, a savage red aura appears around it, which flags an incoming Devastating Attack. The game explains the system here and then expects you to use it for the next thirty hours.
You have two answers to that aura. Empty the stagger gauge before the attack lands, and it never goes off, or Defend with the party and eat a reduced version of it. Staggering is the better outcome by a distance, because a staggered Belmodar loses its scripted turn entirely, which hands you a free round to pile on damage or patch the party back up.
If you land a Sweeping Stagger, the party gets extra turns on top of that, and against a boss with 1 x Phoenix Down as its only drop there is no reason to hold back.
There is nothing else in its kit. Slam, the occasional Devastating Attack, and that is the whole fight. Belmodar tests whether you understood the stagger system rather than whether your party is strong enough, and a party that read the prologue prompts will not lose here.
What the Earth Crystal Chamber Reveals

The Earth Crystal is still intact when Rain and Lasswell reach it, which lasts about as long as the cutscene takes to introduce the armored man from the prologue. He calls them ignorant, destroys the crystal with a single sword strike, and leaves both of them on the floor from the blowback.
The Mysterious Girl from the airship appears once he vanishes. She moves both of them outside the shrine to keep them safe, and they wake up to the rest of it. The squadron soldiers are dead and the airship is wrecked, and the same man is the obvious answer for both.

Rain wants to return to Grandshelt and report what happened, and he says so with some force. Lasswell argues for their hometown of Mitra first and will not explain why, beyond insisting the detour is worth it. The game sides with Lasswell.
Save at the Save Point near the entrance and leave through the south exit.
Mitra, Rain's House and the Vision Crystals

The Overworld Map opens up here for the first time. Follow the main path south, grab the shiny object on the ground for 1 x Potion, and head for the small town with the windmill.
The arrival cutscene covers Rain's father, Sir Raegen, and ends with Lasswell admitting he has kept a key to Rain's house all these years. The camera points at a house with a blue roof at the back of town.
Before going in, work the town. The treasure coffer at the end of the pier down in the dock area holds 3 x Phoenix Down, and the locals around the square are all pleased to see Rain back, which is worth a lap if you want the context on his family.
A merchant near the town center sells a Hairband for 200 gil, which adds 5 Defense. Another merchant runs a shop just north of the Inn with a few items in stock. Cut through the building on the far right into the adjacent yard for a coffer holding 1 x Ether.

The Weapons and Armor shop further north is where the gil you saved at the shrine goes. Bronze Chestplates for both Rain and Lasswell are a real jump in survivability for the castle fight at the end of this part, and a Bronze Sword suits Rain if the budget stretches that far.
Inside the house, check the cupboard between the two beds in the top-right corner for Rain's old stash of 200 Gil. Everything else in the room is dialogue. The back door in the top-left corner is the one Lasswell meant, and the one Rain was never allowed through as a child. The key opens it onto a tunnel, and the tunnel ends at a blue portal.
The portal pulls both of them into the Farplane, where a voice identifies itself as the Will of Light. After a conversation about the duality of light and dark that explains less than it implies, it tells them the world is heading for destruction and points them at the Vision Crystals floating in front of them.

Two Visions come out of those crystals. Leah is a White Mage who handles healing and support. Tronn is a Black Mage built around offensive magic. The Will of Light hands both of them over as weapons against whatever is coming and then runs the tutorial on how they work.
Equip them from the Equipment and Abilities sub-menu, and their skills become usable in battle as if they belonged to the character carrying them. Leah fits Rain and Tronn fits Lasswell, since Lasswell has the higher Magic Attack of the two and Tronn's skills are all magic.
Fighting alongside a Vision also earns Mastery Points on top of the usual EXP. Those raise your Mastery Rank with that specific Vision, which measures how well the character and the Vision work together. Higher ranks make the pairing stronger and add bonuses, which is the reason to settle on an assignment early rather than rotating Visions between characters every dungeon.
One last coffer sits on a cliff on the left side of town. Run directly left past the Weapons and Armor shop and follow the path to the cliff edge for 1 x Ether.

Leave Mitra and head south and east across the nearby bridge. Goblins and Mandragoras are the local encounters. Past the bridge, follow the main path south and then west, using the signpost if you lose track, continue west through the mountain range, then pivot south. A cliff path along the way holds 1 x Mist Potion. Back on the main road, follow it south to the next bridge into Grandshelt. The small wheat field on the right has 1 x Potion, and the lower path running west has 2 x Flame Scroll I.
Then look north at Grandshelt Castle, which is on fire.
How to Beat Hell's Rider in the Burning Castle

Run through the tunnel into the main courtyard, which is on fire from end to end. Lasswell pushes to move in case the King is in danger. Follow the path around the center to the main castle doors, where a Save Point, a shop soldier and a healer soldier are all stacked in one spot. Use all three, because the next Save Point is several fights away.
Inside, cross the first room to the double doors. Charlotte is in the atrium treating wounded soldiers who describe being attacked by wraiths and a man in black armor, which will sound familiar after the Earth Shrine, and who confirm the King is still trapped in the throne room. Charlotte asks to come along and joins the party as a guest.
Take the left path down the hallway until the party steps in to save two residents from undead attackers. The Skeletons that follow use a basic Stab and are weak to Fire, so Lasswell and Tronn clear them in a couple of turns. Afterward the two women explain that undead enemies take heavy damage from restorative items such as Potions and Phoenix Downs, and the younger one hands over 3 x Phoenix Down so you can try it. Remember that, because the next boss fight is built around it.
Follow the left path to its end, go up the north stairs, and run right along the upper level. The first room you pass has a coffer with 2 x Flame Scroll I. Keep going right to the room at the far end, where another soldier is under attack. Clear the Skeletons and he confirms the man in black armor went for the throne room. A Save Point appears when the scene ends.
Take the ladder up to the next floor. Rain's office is along this hall, and a soldier inside hands over 1 x Mist Potion if you stop in. Run left down the hall and take the central stairs down, where a mounted enemy is standing over another soldier.

Hell's Rider is Level 6 with 4,000 HP, drops a Mist Potion, resists most status ailments, and is weak to Ice and Light. Libra confirms all of that in one turn if you would rather see it in game.
Kill the three Dark Skeletons first, and use the Phoenix Downs to do it. Each one lands as an instant KO on an undead target, so three items clear the board and leave Hell's Rider on his own.
Put Lasswell and Tronn on Ice. Rain should have Leah cast Banish for Light damage, which is the first time either Vision does real work.
At some point Hell's Rider uses Poison Gas, which can poison the party and triggers the game's Status Ailments tutorial. That tutorial lists every ailment in the game and what each one does, and it is worth reading once because several of them show up as early as the next dungeon. If Leah has not unlocked Esuna yet, clear the poison with Antidote Herbs or skip the cleanse and keep everyone's health high instead. Mist Potions heal the whole party and are worth holding for exactly this situation.
Once the stagger lands, dump everything into it. If a Resonance triggers, have Tronn use Hibernal Fury, which hits the boss several times with Ice and will take a large bite out of 4,000 HP on its own.
The rest of its kit is Rake and Bite, both of which you have already seen on regular monsters, plus Silver Lance, a single-target projectile attack. None of those will kill a healthy party, so the only way this fight goes wrong is spending six or seven turns grinding down Dark Skeletons with regular attacks while the boss hits you for free.
Rain sends Charlotte off with the surviving soldiers once it falls, so she leaves the party. Head up the stairs on the left, circle back right along the upper level, and go through the double doors in the center.
What to Do Next After the Throne Room

The King is alive and wounded. He confirms the man in black armor did this and that something called the Dawn Signet was stolen, which is the name the game uses here before switching to Divine Signet for the rest of the story. Rain and Lasswell carry him out to the courtyard.
Charlotte takes the King, and then the armored man arrives with his entire order behind him. He identifies himself as Umbra, Veritas of the Dark, one of the Sworn Six of Paladia, and a fight starts.

Do not spend anything on this fight. It has one outcome. Umbra shrugs off whatever you throw at him and then fires what amounts to a Limit Burst for several hundred thousand damage, which ends the battle instantly. He moves to finish the party off and the Mysterious Girl appears again, holding the Sworn Six back long enough for them to leave.
She drops to the ground once the light around her fades. Her name is Fina, and that is the only thing she can remember.
At the Inn, Rain, Lasswell and Charlotte talk it through with the bedridden King. Charlotte explains that recent geological surveys may have pinpointed the Sanctums where more Vision Crystals are kept, and marks them on the World Map along with a possible location for the Sworn Six. Lasswell argues for collecting Visions before confronting anyone, and Charlotte insists on a stop in Felicitas first.

The dialogue choice that follows has two options and gives no buffs either way, so pick whichever reads better. The scene closes on Fina in the next room, listening to all of it.
From there the story heads for the Commercial District, the Village of Kol and eventually Siren's Tower, covered in Final Fantasy Resonance Walkthrough: Chapter 1 Part 2.
Common Mistakes to Avoid in Chapter 1
Skipping the broken ramp in the Earth Shrine. The two Flame Scroll I items down there are the single biggest swing in the Belmodar fight, and the ramp looks like scenery rather than a route.
Swinging at Belmodar with Rain's sword. Rain says the hide is too thick before the fight starts and the game means it. Fire from turn one, scrolls from Lasswell, and the boss never gets its Devastating Attack off.
Looting the Nodachi and leaving it in the bag. Treasure does not auto-equip here. The same applies to the Bronze Chestplates in Mitra.
Emptying your wallet at the shrine entrance. That shop sells consumables you mostly already have. Mitra sells the gear that changes fights, and 1,000 gil does not stretch to both.
Holding the Phoenix Downs during Hell's Rider. They read like emergency revives, so they tend to sit in the bag while the party grinds three Dark Skeletons down the slow way. Used as weapons, they clear the adds at once.
Walking past the purple portal before Belmodar. It is a Teleport point, but it also saves, rests the party with a Tent and warps back to the shrine entrance. The portal sits a few steps from the boss door and plenty of players read it as scenery.
Ignoring the Save Point stack at the castle doors. A shop, a free heal and a save sit together in the courtyard, and the castle interior gives you none of those until after the Skeleton fights.
Trying to win against Umbra. The fight is scripted to end in a loss. Burn no items and no MP on it.


 Det har lyckligt kopierats... Tack för att du delar vårt innehåll!:


Kommentarer