




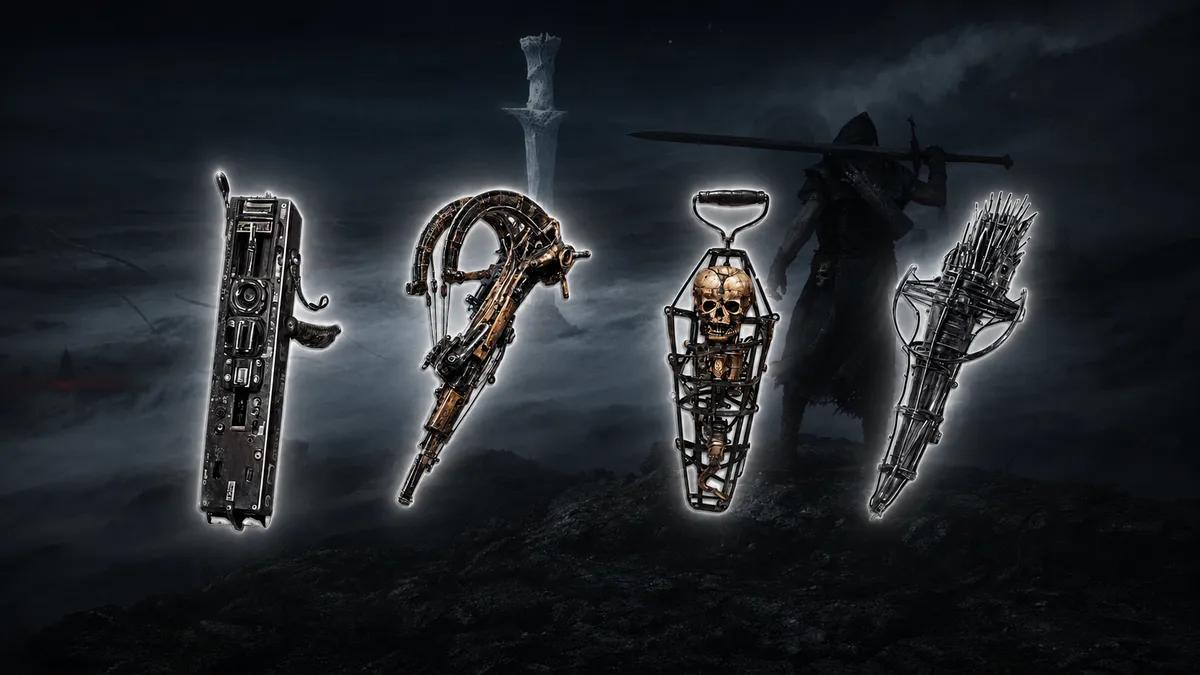
Alla vapen i Mortal Shell 2: Nivålista, platser och bästa tjärstenar










Eight sidearms are scattered across Fallgrim, and not one of them is meant to carry a fight on its own. They exist to solve what your main weapon cannot: a pack you have no room to swing at, an enemy standing on the far side of a ravine, a boss that opens up once every ten seconds. This guide ranks all sidearms in Mortal Shell 2 by pace and reach, pairs each with the Tarstones worth slotting, then walks the route to every pickup. Facts here match the retail build through Balance Patch 1 and Hotfix 2, checked on 23 August, and that patch changed three entries outright.
Mortal Shell 2 Sidearm Rankings
Raw damage decides very little here. You pull a sidearm out mid-combo, which means the wind-up, not the number, determines whether the shot ever lands. Main weapons answer to different rules, and All Weapons in Mortal Shell 2: Tier List and Where to Find Each One sorts those eight by moveset and Tarstone pool instead.
Tier | Sidearm | Pace | Reach |
S | Caged Hystrix | Rapid burst | Medium |
S | Forgotten Crossbow | Measured shot | Long |
A | Naylshotte | Quick shot | Short |
A | Salvaged Trebuchaxe | Burst shot | Medium–long |
A | Troubadour's Lute | Utility | Area effect |
A | Triarch Repeater | Sustained fire | Medium–long |
B | Ballistazooka | Heavy shot | Long |
C | Cursed Child | Utility | Close–medium |
Three placements moved after Balance Patch 1. The Troubadour's Lute had its damage doubled, and both the Triarch Repeater and the Caged Hystrix lost their minimum Resolve requirement, which is why the Repeater climbs out of the bottom half. The Forgotten Crossbow sits at the top with the Hystrix because it doubles as a puzzle tool: bells, gates, and hanging devices all need a bolt, and it stays accurate across the whole of Fainweald and Mammon. I keep the Ballistazooka low for one reason. It asks you to plant your feet while something fast is already running at you, and this game charges more for that mistake than for any other.
Which Sidearms To Pick Up First
The Forgotten Crossbow is the pickup I would detour for. Bolts travel far enough to soften anything in the open world before it notices you, and the same shot clears the environmental targets that block progress in half a dozen dungeons. Infuse it with Burn through the Emberseed Stone and add the Barrage Stone, and you can stand above the Lost Child in Sanguine Caverns firing volleys down while its acid streams land nowhere near you. That fight is one of several where a ranged option beats patience, and All Bosses in Mortal Shell 2: Locations, Order and Full Checklist flags which encounters leave that kind of window open.
The Troubadour's Lute is the other early priority, and it deals almost nothing directly. It inflicts Confusion, and affected enemies spend the next few seconds tearing into each other. Fallgrim throws groups at you constantly, so removing three attackers without swinging once is worth more in the opening hours than any damage number. It works on the Circle of the Grasping Root, the Rabid Grisha Pack, the Gloombound Legion, and the mob phase of Bor the Deluded Monarch. I carried it over every gun in the game for my first ten hours, because crowds killed me far more often than any single elite did.
Tarstone Pairings for Every Sidearm
Slotting the right stone reshapes a sidearm more than four levels at the forge ever will. Which Shell you are wearing matters just as much, and All Shells in Mortal Shell 2: Where to Find Them, Unlocks and Best Picks covers how each one changes your damage floor before any of this gets applied on top.
Sidearm | Tarstone | Tarstone | Where to find them |
Naylshotte | Confessor's Keepsake | Emberseed Stone | Tishina's Confessor drop; chest in Passenger's Shrine |
Forgotten Crossbow | Barrage Stone | Myriad Stone | Gloomshade Grove trial; Feeding Grounds dungeon |
Troubadour's Lute | Enfeebling Stone | Hand of Rock | Outskirts of Mammon trial; 1,500 coins in the tavern |
Salvaged Trebuchaxe | Charged Stone | Squall Stone | Odious Crevice dungeon; Central Sewers dungeon |
Triarch Repeater | Marksman's Stone | Rupturing Stone | Chest near Mushroom Village Gate; Prisoner's Domain |
Ballistazooka | Deadeye Stone | Rupturing Stone | Ranged critical damage stone; Prisoner's Domain |
Caged Hystrix | Hag Stone | Splitting Stone | Infested Den dungeon; chest in the Lonesome Spire |
Cursed Child | Charged Stone | Enfeebling Stone | Odious Crevice dungeon; Outskirts of Mammon trial |
Both heavy guns run on the same logic. Marksman's Stone raises critical chance, Deadeye Stone raises critical damage, and the Rupturing Stone converts those criticals into Break damage, so a steady stream of shots eventually forces a riposte. That combination is how most players finally crack the Hexapod. Charged Stone deserves a mention on its own: at level 4 it cuts charge time by half, which is the difference between the Trebuchaxe being a siege tool and being a liability.
Where To Find Every Sidearm in Mortal Shell 2
One sidearm comes free in the prologue, three sit across Fainweald, and four wait in the Ruins of Mammon. Three of them drop off a boss. Everything below assumes the Tarforge is already handling your upgrades, and Tarforge in Mortal Shell 2: Unlock Items, Materials and Upgrade Order explains which item unlocks the sidearm bench in the first place.
Naylshotte
Nothing about this one takes effort. Finish the Festival sequence in the prologue, talk to the Undermether, and your starting kit arrives in one handful: the Naylshotte, your first melee weapon, and the Untarnished Seal for blocking. Players who finished the Open Beta and chose to skip the prologue open the main game with it already equipped.
It throws a spread of projectiles at close range, which puts it closer to a shotgun than a pistol. Two shots to interrupt a wind-up, then straight back into melee, is the pattern that keeps it useful past Fainweald. Confessor's Keepsake pushes its blast to 350% damage at full upgrade, and the Emberseed Stone adds Burn for the long fights.
Forgotten Crossbow
The Flooded Village dungeon holds it, west of where Proxima's Shell waits. Two published routes lead there. One drops down the sloping path from Widow's Overlook and crosses the rope bridges into the lower crags. The other heads down and northwest from the Blackridge Pass Beacon. Both arrive at the same stone archway sealed behind wooden boards, guarded by Spear Maidens and Toxic Cultists.
Smash the boards, peer through the gap to manifest the opening, and a tower entrance appears. Hit the wall switch to raise the cage and ride the elevator down, which collapses the moment you arrive. Fight through the Toxic Stalkers to the house at the back left of the pools for the Damp Key, then unlock the central building. The crossbow rests on a table inside, along with an orb that returns you to the entrance.
Troubadour's Lute
The One-Legged Wolf Tavern in eastern Fainweald keeps the Lute on its stage. Siphon eight Ova to unlock Mother's Breath, travel to the Mushroom Village Beacon, and head right toward Hilga's house. Push through the corruption, take the first left, follow the path past the dungeon to the One-Legged Wolf Beacon, then walk southeast down into the tavern. The instrument sits on the left of the stage, beside the NPC already playing one.
Plenty waits inside besides the sidearm. A Barkeep trades items, the Hand of Rock Tarstone costs 1,500 coins over the counter, and Gragu sits at a table waiting for a Heart of Vatra. The Lute is the one sidearm in the game with no upgrade path at all. Its position shifted between the beta and launch, so older wiki entries will send you somewhere it no longer is.
Salvaged Trebuchaxe
Head south from the Gloomshade Grove Beacon, past the citadel, and keep descending toward the water. The Ravaged Hideout entrance sits down there, and the Bloodcursed Lithopod crawls out before you can use it. Kill the crab and it drops the Citadel Gate Lever, which opens the Citadel of Penance permanently and clears the dungeon door at the same time.
Walk the hideout through to the final room, where the launcher lies on a body. It fires whole axes across a long charge, so it belongs in siege situations: a staggered boss, a distracted target, anything that will still be standing three seconds from now. Trying to use it as a panic button will get you killed.
Triarch Repeater
Blackwell Cavern holds the Repeater, and the two published approaches disagree on direction. One takes you east-southeast from the Castigator's Keep Beacon along the cliffside path, down a wooden lift, and around a grassy field to the cave mouth. The other drops to the lower level from the same beacon and heads north toward the cliff. Tag the nearby rest area whichever way you go.
Visibility inside runs to a few feet, so walk the tunnels rather than sprinting them. The Repeater sits on the ground in the first properly lit chamber, near the broken wagons. Balance Patch 1 stripped out its minimum Resolve requirement, which finally lets you fold it into a normal combat rotation instead of saving it for set pieces.
Ballistazooka
Sentry's Grave is tucked into the Lonesome Spire, and the cleanest approach runs north from the Abandoned Outpost Beacon toward the tower rather than into the Deserted Slums. Watch the alcoves on the way up for the dungeon entrance. An alternate route climbs northwest from the Gate of Mammon Beacon and follows the building clockwise to the same door.
Subjugated Sentries fill the interior, firing across walkways suspended over lava, and sprinting the gauntlet beats clearing every room. The Subjugated Guardian waits at the end, a scaled-up Ballista Head whose bolts detonate on impact. Take the stairs to deal with the flanking enemies first, then close in and stay glued to it, which limits the boss to head slams you can parry.
Caged Hystrix
From the Silent Steps Beacon, take the Bone Gate ahead to the upper structure and head southeast to the central extension, where Sariel, the Endless picks a fight. Win that one and the door behind the nearby statue unseals. Climb the stairs into the Chamber of Becoming.
Sariel reappears inside and refuses to stay dead. A sigil on the floor is ringed by four stones, and until all four are broken he resurrects at zero health indefinitely. Smash them, finish him, and he unlocks as a Shell while dropping the Clockwork Scythe. The Caged Hystrix sits up the stairs at the back, near the exit, and Balance Patch 1 freed it from its Resolve floor as well.
Cursed Child
The Revered Beacon dungeon sits in the abbey district, and the routes split by beacon. From the Abbey Entrance Beacon, climb into the fort, take the right-hand path down the steps until you leave the building, then turn left twice past an enemy carrying an Obsidian Hammer. From the Sester's Gate Beacon, drop off the walkway ledge in the Rollerball courtyard, shoot the bell to open the way down, and head northwest.
A tower in the middle of the dungeon sweeps golden light across the floor, and standing in it drains your health steadily. Move between walls and let the beam burn the enemies instead, since fighting them is optional. Work your way around to the tower and strike the central pillar to kill the light, then collect the Cursed Child from the top.
Picking The Right Sidearm For Your Build
Choose by the gap in your main weapon, not by tier. Crowds call for the Lute or the Caged Hystrix. Anything you cannot reach calls for the Forgotten Crossbow early and the Trebuchaxe once you can afford the charge time. Bosses that grant a single opening per cycle are where the Ballistazooka finally earns its wind-up, though you will still be safer using the Repeater there. And if a sidearm has sat unequipped for five hours, smelt it at the forge and put the materials somewhere useful instead.


 Det har lyckligt kopierats... Tack för att du delar vårt innehåll!:

Kommentarer