


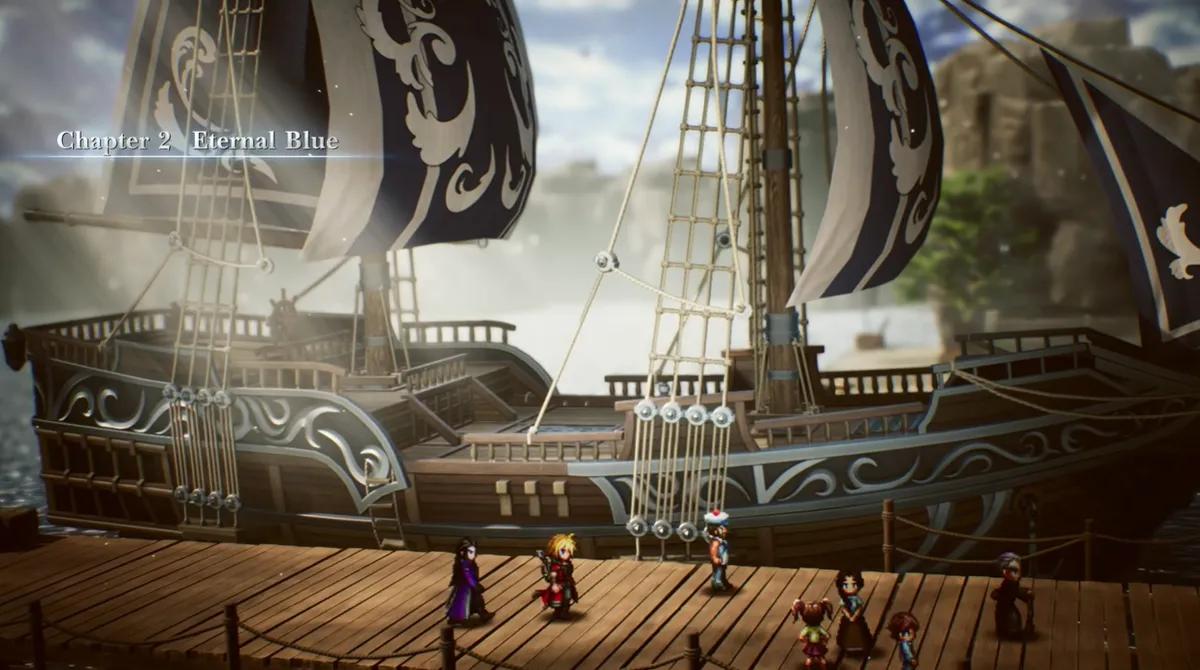
Genomgång av Final Fantasy Resonance kapitel 2: Mt. Thunderclap, Mobliz-varvet och Aether


 Square Enix
 Fantasy
Chapter 2 is where Final Fantasy Resonance starts trusting you with systems instead of explaining them. Dirnado hands over a fourth party member, two more Visions, an optional Esper far above your level, and a dungeon that puts a countdown on the exit. It also ends with the first Sworn Six fight the game actually expects you to win.
Eternal Blue Quest Overview
Chapter 2 runs from the dock on Dirnado to the deck of Lid's finished airship. Everything before it, including Siren's Tower and the ship out of Grandport, is in Final Fantasy Resonance Walkthrough: Chapter 1 Part 2.
Chapter | Chapter 2: Eternal Blue |
Starting location | The Dirnado dock, south of Dilmagia |
Main objectives | Find an airship, cross Mt. Thunderclap, reach the Wind Shrine |
Bosses | Liquid Thunder, Mom Bomb, Epimetheus, Adrastea, Aether |
Visions unlocked | Zidane, Noctis |
Party member added | Lid, with Mechabo |
Permanent buffs | None, the one dialogue choice here has no effect |
Ends with | The party leaving Dilmagia for Olderion |
Aether is the first Veritas of the Sworn Six you are meant to beat rather than survive, and the game recommends Level 18 for it. The full chapter order sits in the Final Fantasy Resonance Walkthrough: All Chapters hub.
Two things in this chapter are easy to walk past and expensive to miss. One is an accessory in Dilmagia that halves Lightning damage immediately before a Lightning-themed mountain. The other is a numbered lever during a timed escape, where guessing costs you minutes you do not have. Both are flagged in place below.
Dilmagia: Every Shop Upgrade and the Insulated Gloves

The chapter opens with the ship docking on Dirnado and the Captain pointing the party toward a city called Dilmagia. Before anyone leaves the dock, Rain and Lasswell notice Fina behaving strangely.
She turns and speaks to them in a completely different register, as though she is someone else, and says something that implies she knew Rain years before any of this started. Then she collapses. A moment later she gets back up with no memory of the last thirty seconds, and Rain adds it to the list of things about her that do not add up.
Follow the main path west a short distance. Dilmagia is the city buried under scaffolding, and it is hard to miss.

The party splits on arrival, which is the game's way of letting you explore without three people following you around. Fina goes sightseeing, Lasswell handles supplies, and Rain takes the job of asking about the Wind Shrine.
Start with the ladder on the right, which leads to an elevated platform with a coffer holding 500 Gil.
The young girl standing immediately to the right of that ladder mentions seeing a large figure up on Mt. Thunderclap. Talking to her is what unlocks the intel on the Esper hiding up there, and the game does not flag her as important in any way. Skipping her means walking past Ramuh later without knowing he exists.
Three locals carry gold Main Quest icons, and the quest will not move until all three have been spoken to. Their collective answer is that crossing this continent sensibly means owning an airship, which is not something Rain can simply requisition out here.
The local down the right-side path near the Weapons and Armor shop is the one who names Lid, a builder who might have an airship she would part with.
While you are on that side, Silvia stands in front of the flyer board with blue hair and the Elven Maven sub-quest. Its objective sits on Mt. Thunderclap, which you are about to walk through anyway.
The shops here are a real step up from anything in Chapter 1, and the item shop in particular stocks things that did not exist on the first continent. Prices are high enough that the full list is out of reach, so buy toward the mountain rather than toward the shrine:
- Composite Bow for Fina and two Iron Armors for Rain and Lasswell, with a White Dress for Fina if the gil stretches
- Mist Ether restores MP across the party, and Unicorn Horn cures Paralysis, which the next dungeon hands out freely
- Knife of Blind and Knife of Silence deal damage and apply their named ailment, and Earth Scroll I covers Earth damage before anyone in the party has it
Unicorn Horn deserves particular attention. Paralysis is common among Lightning enemies and Mt. Thunderclap is full of them, and a paralyzed character does nothing at all until it wears off.
The Moogle of Light floats near the Inn if you have Magicite to spend on Vision tiers. Anything you banked in Chapter 1 is worth cashing in now rather than carrying it across the continent.
Once all three locals have been spoken to, the party regroups in the center and agrees to go see Lid. Head north toward the main gate, but detour right first, past the old man in green, and follow the hidden path to the right. The coffer at the end holds 1 x Insulated Gloves, which halve Lightning damage. Mt. Thunderclap is named after what it does to you, so this matters.
The Shipyard, Lid and Mechabo

Take either staircase to the upper level and head for the railing with the quest marker on it. That triggers the introduction to Lid and her mechanical Chocobo, Mechabo.
She says no to renting the airship before Rain finishes the sentence, and then admits the real problem. The ship does not fly. It needs a Wind Crystal to power it, and the nearest one sits inside the Wind Shrine, which happens to be exactly where the party was already heading. Their interests line up by accident.
Getting there means crossing Mt. Thunderclap first, so she comes along. Lid joins the party here, with her own equipment and Vision slots in the Main Menu.

She is the party's first Commando, a Role built around dealing damage, though her highest individual stat is Physical Defense, which makes her sturdier than the label suggests.
She also brings Stone-type attacks, which nobody else in the party has access to and which the next two bosses care about. Set her equipment and her Vision slot before leaving, because the mountain starts the moment you step outside.
There is also a comedy scene between Lasswell and Mechabo before the group sets off, which is the first time Lasswell has been allowed to look foolish.
Clear the shipyard before leaving. The catwalk up the left-hand stairs has a Tablet Shard on the ground at the far end, and the catwalk on the right has a coffer with 500 Gil.
Take the ladder down to the lower level on that same right side and run left until a second Tablet Shard appears by a pillar. The lower catwalk on the left side ends in a coffer holding Anti-Magic Gear, a large Magic Defense increase and the second half of your Liquid Thunder preparation.
Mt. Thunderclap and How to Beat Liquid Thunder

Back on the Overworld, follow the main path north from the city until a cave entrance appears on the left, just before the broken bridge.
Lid asks why the party wants the Wind Shrine, Rain explains the Sworn Six and the crystals, and she half remembers a story about a catastrophe before writing it off as folklore.
Then she makes an offer. For 1,000 Gil she will guide the party up a route she describes as easy-peasy, with far fewer monsters on it. The alternative is the normal path, which has plenty.
Paying skips a large amount of fighting and drops you near the next Save Point, so the question is whether you want the gil or the EXP. Turning her down is not permanent either. Approach the grassy patch to the left of the Save Point and examine it to bring the offer back.
The route up is a single path with no branches and no optional rooms, so the only decision left is how much of it you fight through.
The monsters along it are mostly Lightning-type, which is where Lid and Mechabo earn their place with Stone attacks, and the Insulated Gloves from Dilmagia cut the incoming damage noticeably. Equipping them on whoever is squishiest rather than on Lid is the better call, since she already has the defensive stats.
Halfway up, grab the Tablet Shard from the ground, then Examine the strangely colored tree standing nearby. That one interaction completes the objective for the Elven Maven sub-quest.
Use a Tent at the next Save Point. The thing blocking the path ahead is not optional.

Liquid Thunder is Level 13 with 10,000 HP, weak to Stone, resistant to Thunder, and drops a Lightning Scroll I. It shrugs off most status ailments, with Silence as the exception worth trying.
Everything it does is magical. There are no physical attacks in its kit at all, which means Protect does nothing and your entire defensive plan is Shell or Shellga plus the Anti-Magic Gear and Insulated Gloves you picked up. Its Lightning attacks come in both single-target and party-wide flavors.

On offense, Lid's Stone attacks carry the fight and the Warrior of Light adds more of the same element. Push the stagger meter hard rather than trading damage turn for turn, because every round it spends acting is a round of party-wide Lightning.
Siren is worth a summon if the party is taking more than it should, and Silence is the one ailment with a chance of sticking, which cuts off its entire offense if it lands.
When it falls, Lid suggests a stop at the Dwarven Forge to collect custom airship parts she has on order. Leave through the tunnel opening on the left.
How to Unlock Zidane and Where Ramuh Hides

A Sanctum of Light sits directly along the route to the forge. Cross the wooden bridges and it is just off to the right.
The usual three questions from the Will of Light hand over Zidane. His Role complements Lid's, so she is the obvious carrier, and it gives her something to work with while Mechabo is still in one piece.
There is also an upper path leading back into a higher section of Mt. Thunderclap, and it is worth the detour. It holds another Tablet Shard and a coffer with the Cape of the Raiju, which the lower route could not reach. You can also lower a ladder from up there down to the entrance, which shortens the trip if you come back.

That same path leads to Ramuh, the Lord of Lightning, who waits by a gravestone at the cliff edge near a Save Point. Approaching the gravestone starts the fight, and Ramuh is a Level 20 encounter at a point where the party is sitting somewhere in the mid teens. He is not going anywhere, so note the location and come back when the numbers work.
The Dwarven Forge, Noctis and How to Beat Mom Bomb

Follow the main path inside the forge to an elevator and ride it down. Run north and the local vendors sit over to the right.
Prices here are steep enough that buying everything is not realistic, so pick carefully.
The Ashura for Lasswell at 4,200 gil is the biggest single stat jump on the shelf and the one purchase worth making regardless. Phalanx armor at 2,250 Gil lifts Lid's defaults, which matters because she joined the party in whatever she was wearing. The Moogle of Light is here too, along with a Save Point.
Take the path left to the smelting area and approach Borin. The conversation that follows covers the history of the Cids, a title rather than a name, including the first one who built the first airship centuries ago. Lid states outright that she intends to be the next one, which the chapter ending pays off in a way she does not expect.
He hands over her parts and then asks for a favor, because a monster has moved into the forge and the dwarves cannot work around it. Clear it and the parts cost nothing, which Lid accepts on everyone's behalf before anyone else gets a word in.
The monster sits down the stairs to the left. Detour south from those stairs first for a Tablet Shard, then pivot right onto the wooden walkway and open the coffer at the end for a Headband accessory.

Mom Bomb is Level 14 with 21,000 HP, weak to Water, resistant to Fire, and drops a Flame Scroll II. Status ailments mostly do not stick.
Its whole kit is Fire, including a party-wide move called Firestorm that justifies getting Shell or Shellga up before anything else. The physical option, Body Slam, does not hurt much by comparison. Fina summoning Siren for Watera is the strongest single source of damage available to you here.
Below half health it uses Explode, which hits the entire party hard and splits the boss into four separate Great Bombs.
Heal everyone back up before engaging them rather than during, because four enemies acting every round while the party is at low health is how this fight turns around. Each Great Bomb then dies the same way a regular Bomb does, so the second half is slower rather than harder.
Report the win to Borin and the news comes back the other way. Another dwarf runs in and says Borin has been taken by someone in armor, which everyone immediately reads as the Sworn Six. The destination is the Mobliz Shipyard, possibly so he can be made to build something.

Rest at the Inn and save before leaving through the north exit. On the way, take a short detour west to another Sanctum of Light. Three questions about Noctis and his road to the throne, and Noctis joins the Vision roster.
Mobliz Shipyard: All Treasure Before the Alarm

The shipyard is north and then west of the Dwarven Forge, in the opposite direction from the Wind Shrine. Follow the west path and circle around to the main building behind the treeline.
Lid spends the arrival looking at portraits of every Cid on the back wall. Rescuing Borin is the stated objective, so take the metal walkway west until the party runs into something new.
The anti-monster security mechs here were built to keep monsters out of the yard, and Lid works out quickly that they have been sabotaged to attack anyone who walks in instead. They fold to Lightning-type attacks, so Tronn and Cloud clear them fast.
Continue west and then north into the next section, which is where the elevator puzzle starts. The lifts directly ahead show red lights and do not work. Follow the metal walkway west to the one working elevator at the far end, step on, and press the button in the corner.
Step off and bypass the fenced area immediately on the right for now. Head to the north fenced area first and open the coffer in the back for a Chocobo Down Charm, an accessory that lets the wearer survive one fatal blow per battle. It is the kind of item worth saving for a boss rather than wearing through a dungeon.
The golden jar in the center of that area is a Magic Pot. Interacting with it starts a fight where your attacks land for 1 HP each, because the only way to beat it is to hand over the consumable it asks for, usually an Ether, Potion or Phoenix Down. Flee if you do not have it and the jar stays put for later.
The south fenced area holds a lever on the side of a machine. Pulling it powers up one of the dead elevators on the floor below, which is the whole reason for the trip up here. Before leaving, take the ladder in the bottom-right corner down to a hidden platform with a coffer holding the Protective Overcoat for Fina, which raises Physical Defense and Sanctity at the cost of Magical Defense.
Ride back down to the lower level, run right, and take the elevator that lever just brought back online. Follow the path around to a stairwell going down, then take the lower path to a Save Point.
A coffer sits behind a shipping container on the left with 3 x Eye Drops, which is the easiest pickup in the dungeon to walk past.
Save properly here. The game puts up a prompt warning that a unique event starts past this point and asks you to save manually, which is the only warning you get.
The 15-Minute Escape and How to Beat Adrastea

The elevator opens onto the outdoor top level, where a crowd of dwarves is working on an enormous airship. Lid identifies it as The Invincible, an airship out of legend, and starts wondering aloud how anyone could have built it.
Borin then walks up, not kidnapped and in no apparent distress.
He explains that this is the real Invincible, dug out from underground, and that nobody is forcing anyone to repair it. The ship's core, the Heart of Babel, is locked down, which is the only reason it is still on the ground.
The shipyard's security system goes to high alert before he can say more. Borin gives the party 15 minutes to get out before the mechs swarm the place, and a timer starts.
Hold Sprint for the entire retreat. The timer does not pause for random encounters, which means every fight you take is time off the clock, and the route back is the same one you spent the last stretch exploring.
The elevator back to the entrance loses power partway through the retreat. Run right to the fenced area, where Mechabo breaks through a panel so the party can reach the lever bank inside. Pulling the wrong lever starts a random encounter and burns time, so do not guess. Lever 16 is the one that restores the elevator you need.
The entrance area turns out to be full of mechs anyway, which makes the whole lever detour feel deliberate on the game's part. Head back and take the other elevator that has opened up in the meantime, which leads down to a cargo train on the underground level.
An Epimetheus security mech arrives on that elevator and has to be destroyed before anyone boards. Keep an eye on the clock while you do it.
If you need to step away, the System Menu has a hard pause that stops the clock.

Underground, Lid's brother Evan is waiting with a giant security mech and no expression at all. He orders it to fire, Mechabo intercepts the blast and takes the damage meant for the party, and everyone boards the cargo train while Evan watches.
The mech catches the train.

Adrastea is Level 16 with 25,000 HP, weak to both Water and Thunder, and drops a Lightning Scroll II.
Open with protective buffs, because it opens with firepower. Cloud is the standout Vision here since he covers both of its weaknesses, and anyone with strong magic should be prioritized for damage. Its attacks mix single-target and party-wide, mostly projectiles, with the occasional Fire spell.
The mechanic that decides the fight comes later. Once its stagger gauge drops low enough, Adrastea begins charging the same attack that hit Mechabo. If it lands, the train and the party go with it, so there is no surviving it defensively. The answer is to finish emptying the stagger gauge before the charge completes, pile on damage during the opening that creates, and repeat when the cycle restarts. Siren is worth a summon for the Water damage.
The mech breaks down and falls back into the dark when it dies, which solves one problem and leaves another. The train's brakes are gone, so the party is getting off considerably faster than planned.

The scene then cuts away to confirm what the shipyard implied: Dr. Lazarov is behind the behavior of everyone working at Mobliz, including Evan.
Arise Mechabo and Every Wind Shrine Coffer

The tracks dump the party back at the Dwarven Forge, near where Mom Bomb died. A dialogue choice with two options comes up during the conversation that follows, and neither one does anything, so pick either.
Lasswell raises the idea of having the dwarves repair Mechabo, which introduces Verun, a blue-haired blacksmith Lid describes as one of the most sought-after craftsmen alive. He takes the job on and asks for 2 x Dynamo Stones in return, which starts Arise, Mechabo!
Prioritize it. Mechabo cannot be used in battle until the repair is done, and Lid loses a chunk of her kit without it. The stones come from Ipooh enemies, large grizzly-bear monsters that wander the grassy areas just north of the forge, usually in groups large enough that one encounter covers the requirement.
Hand them over and Mechabo comes back working, which completes the quest and pays out 1 x Magicite Shard.
It also opens a second one. Verun will take materials in exchange for Mechabo upgrades that add to its utility in battle, starting with Chimera Talons from three Dhorme Chimera monsters under Mechabo Evolved. That quest runs alongside the story rather than blocking it, so pick the talons up whenever Chimeras show up.
Restock at the shops, rest at the Inn and save. Roy, the silver-haired bard nearby, hands out Lyrical Riddles, which sends you back to Mobliz Shipyard, so take it only if you are willing to go back there.
Leave through the north exit and go east at the fork. Follow the east path, veer north, and the Wind Shrine sits at a dead end against the mountains.
Inside, the soldiers assigned to guard the shrine are dead, which the party has now walked into twice. A voice fills the room and announces itself as Aether, Veritas of the Heavens, one of the Sworn Six.
He warns the group away from what he calls their greater plans. Rain has no interest in the warning, so the objective becomes finding the source of the voice while checking on the Wind Crystal.

Save at the Save Point on the right and take the stairs ahead. Interact with the pedestal beside the hole in the floor to summon an elevator, and grab the Tablet Shard beside the pillar on the right before riding up. From there the shrine runs on one loop repeated at different heights. Ride an elevator, cross a walkway, find the next pedestal, summon the next elevator.
The first takes you up, the second carries you across the room to another walkway, and the third goes back down to a lower level. Follow that walkway south, then right and around to the next platform, and ride it across. The shrine is more vertical than complicated, and nothing in it branches, so the only way to lose time here is missing the pedestals.
The shrine holds four pickups along the way:
- Tablet Shard, beside the pillar to the right of the first pedestal
- Tsukiyo no Tachi, up the flight of stairs on the third walkway, then across the elevator platform at the top
- Tablet Shard, in the corner to the right of those same stairs on the way back down
- Armor of Gales, down the narrow stairwell behind the pillars at the south end of the walkway
The Tsukiyo no Tachi is a straight upgrade for Lasswell and halves the damage he takes from Wind attacks, which is relevant in about ten minutes. Armor of Gales adds Magic Defense and 20 MP, and also suits him.
The highest level has an open doorway to the right leading outside to a Viridian Pot, a variant of the Magic Pot that works the same way. Otherwise head north to the Save Point, use a Tent, and take the stairs to the elevator platform.
How to Beat Aether and End Chapter 2

The Wind Crystal is still intact when the party arrives, and Aether turns up to explain why that is temporary. The Sworn Six want it destroyed so The Invincible can fly, and he does not elaborate on what they intend to do with it afterward.
Unlike the Umbra fight in Chapter 1, this one is real and winnable.
Get the party to Level 18 before starting, and bring a stack of Ethers, Turbo Ethers and Mist Ethers. Healing and elemental skills will drain MP faster than anything so far.

Aether is Level 18 with 34,000 HP, weak to Ice, and drops the Slyph's Tiara.
Lasswell's inherent Ice skills do the heavy lifting, backed by any Vision carrying Ice. Keep Shell on the party as close to permanently as you can manage, since most of what Aether throws is magical.
He opens with single-target attacks, Stab and Shamshir, which are survivable and give you a few rounds to get buffs up.
A couple of turns in he starts summoning Minions and Guardians. These are stronger versions of the Wind Elementals patrolling the shrine, they share his weakness to Ice, and unlike him they can be hit with Sleep and Silence. Kill them quickly rather than playing through them. Leaving them alive stacks magic attacks and status ailments on top of everything Aether is doing, and Sleep landing on a healer at the wrong moment is how a winning fight turns.
Once Aether powers up, two party-wide attacks come out. Heavenly Wind does significant damage across the group, and Cyclone does the same. Both require an immediate round of healing, which is the real reason for the Ether stockpile.

He loses, drops to his knees, and the front of his helm falls away.
Then he destroys the Wind Crystal anyway. Refusing to accept the result, he pulls together whatever strength he has left and finishes the job he came for, which makes this the second crystal gone and the second time the party has arrived early enough to watch and too late to stop it.
The Invincible rises from the Mobliz scaffolding and takes off. Aether declares the job done, replaces his helm and vanishes into the sky.
What stays with Lid is his face. She identifies the man in dragoon-style armor as the first Cid, the one who built the first airship hundreds of years ago, which should not be possible by any reading of the history she grew up on.
She is certain about it even though his words contradicted everything that Cid supposedly believed about airships bringing people together. Rain notes the direction The Invincible took, toward a continent called Olderion, and Lid asks to come with them to find out why Cid is working with the Sworn Six. She also picks up a wind crystal shard off the ground for her own airship.

Fast travel back to Dilmagia, rest and save at the Inn on the west side, clear any sub-quests you want to close out, then meet Lid on the upper platform of the shipyard. Choose Ok! at the prompt and the chapter ends with the party setting course for Olderion.
Olderion, the Wardens of the Waters and the Water Shrine are covered in Final Fantasy Resonance Walkthrough: Chapter 3.
Common Mistakes to Avoid in Chapter 2

Walking into Mt. Thunderclap without the Insulated Gloves. They sit behind a hidden path in Dilmagia, past an old man in green, and the entire mountain is Lightning-based.
Using Protect against Liquid Thunder. It has no physical attacks at all. Shell, Shellga and magic defense gear are the only mitigation that does anything.
Guessing at the levers during the escape. Every wrong pull triggers a random encounter while the 15-minute timer keeps running. Lever 16 is the one.
Letting Adrastea finish its charge. The attack that hit Mechabo ends the fight outright. Emptying the stagger gauge is the only counter, so damage has to go there rather than into raw HP.
Skipping Arise, Mechabo! Mechabo is unusable in battle until Verun repairs it, and the Dynamo Stones come from a single Ipooh encounter a short walk north of the forge.
Entering the Aether fight under Level 18 or short on Ethers. He has 34,000 HP, two party-wide attacks and a steady stream of summons. Running out of MP partway through is how this fight is lost.
Fighting Ramuh on the way to the Dwarven Forge. He is a Level 20 encounter sitting on an optional path, and the party reaches him well before it can handle him. Note the gravestone and come back.
Missing the girl by the ladder in Dilmagia. She is the only source of the intel that puts an Esper on Mt. Thunderclap, and nothing else in the city points at it.
Riding the final elevator at Mobliz without saving. The game warns that a unique event starts past that point and asks for a manual save, which is the last chance before a 15-minute timer and two forced fights.


 Det har lyckligt kopierats... Tack för att du delar vårt innehåll!:


Kommentarer