



Alla vapen i Mortal Shell 2: Nivålista och var man hittar vart och ett










Fallgrim hides eight melee weapons, and the game never once tells you which are worth the walk. Two can be in your hands before Fainweald is finished. The rest sit behind minibosses, illusory walls, and long chains of Bone Gates in the Ruins of Mammon. This guide covers all weapons in Mortal Shell 2: where each one hides, how it handles once you are holding it, and how the eight stack up against each other. Sidearms form their own category with eight more entries and are ranked separately.
Every Weapon in Mortal Shell 2 at a Glance
Below is the full roster in roughly the order a normal playthrough reaches it, starting in the prologue and running through Fainweald into Mammon, with whatever dungeon, boss, or key stands between you and each pickup. Your ranged slot fills on a completely different schedule, and All Sidearms in Mortal Shell 2: Tier List, Locations and Best Tarstones maps those eight against the same route.
- The Iconoclast — handed over in the prologue the moment you equip the Harros the Vassal shell.
- Axe & Dagger — Shrine of Trials dungeon in Mushroom Village, behind the Chapel Key.
- Veteran's Battle Axe — The King's Crypt in the Blackridge Cliffs, below the Shattered Beacon where Proxima rests.
- Great Martyr's Blade — Martyr's Prison, a dungeon in Gloomshade Grove beside the Citadel of Penance.
- Obsidian Hammer — Obsidianite Mines in Mammon, dropped by the Prophet of Profane Infinities.
- Axatana — a gated room in the Forgotten Tower, reached from Castigator's Keep through the Vestige of Infinity.
- Black Needle — carried by the Stray Sester who appears after the Twin Sesters fight in Sester's Bastion.
- Clockwork Scythe — Sariel, the Endless drops it in the Chamber of Becoming near Silent Steps.
- Hallowed Sword — a database entry with an upgrade table and nothing else attached to it.
Three come off a boss or miniboss, and a fourth is gated behind one. The others need a key, a lever, or a well-aimed bolt at a bell, and none of those puzzles hold up anyone who knows which room they are standing in.
Mortal Shell 2 Weapon Rankings

Numbers separate none of these. Every weapon climbs the same curve at the Tarforge, with damage, stagger damage, elemental efficiency, critical chance, critical damage, and Resolve regeneration all moving from 1.0 to 2.0 by +20. Speed, reach, and Tarstone pool do the real sorting, and All Bosses in Mortal Shell 2: Locations, Order and Full Checklist shows how badly the slow options struggle once unblockable strings enter the picture.
Tier | Weapon | Standout stat |
S | Axatana | Morph Attack, swaps weapon class mid-combo, 10 Tarstones |
S | Black Needle | Needle Storm, fastest thrusts in the game, 12 Tarstones |
A | Great Martyr's Blade | Spiral Surge, longest reach of the two-handers, 9 Tarstones |
A | Axe & Dagger | Deadly Flurry, fastest option before Mammon, 9 Tarstones |
B | Clockwork Scythe | Clockwork Chainsaw, wide arcs for mobs, 3000-coin map |
B | Veteran's Battle Axe | Heavy chains that hit without being sluggish, 300-coin map |
B | Obsidian Hammer | Heavy Stomps, the only weapon that accepts the Colossus Stone |
C | The Iconoclast | Plummet Strike, 8 Tarstones, free in the prologue |
Unrated | Hallowed Sword | Database entry with no description or location |
These placements assume a first run with no maps bought from Merrick. Purchase them and everything in Mammon rises, since the hunt collapses into a straight walk. The Black Needle climbs because its light thrusts land faster than anything else in the roster while keeping you further from the enemy than a dagger can, though its heavy attacks are slow enough to ignore. The Veteran's Battle Axe deserves more credit than its plain description suggests, since its heavy chains hit without the crippling recovery of the hammer. The Axatana holds the top spot because its light and heavy attacks morph the weapon mid-combo, covering the two situations that kill newcomers, packs and single elites.
Which Weapon To Grab First
The Axe & Dagger is the first real step up from the Iconoclast, and it waits in the Shrine of Trials beneath Mushroom Village. Deadly Flurry pays you for applying pressure rather than for waiting, so you spend less time reading wind-ups and more time cutting them short. It also takes the Duality Stone, which the Iconoclast will not accept, and pairs beautifully with a poison infusion from the Serpent Stone. Its running light attack kills basic enemies in the opening zones outright, which trims the walk back after every death.
The Great Martyr's Blade suits the opposite temperament. Spiral Surge and the running heavy attack close gaps and stagger, which pays against single targets far more than against crowds, and the running heavy grants a few invincibility frames on the way in. Reaching it means clearing Martyr's Prison in Gloomshade Grove, and the Bloodcursed Lithopod has to die first for the Citadel key. Whichever of the two you take, your Shell shapes how it feels in the hand, and All Shells in Mortal Shell 2: Where to Find Them, Unlocks and Best Picks covers which bodies suit a fast weapon and which want the heavy one.
Where To Find Every Weapon in Mortal Shell 2
Merrick at the Marrow Keep sells location maps that pin the weapon on your overworld map. Prices run from 300 coins for the Veteran's Battle Axe to 3000 for the Clockwork Scythe, with the Great Martyr's Blade at 500, the Axatana at 1100, and the Obsidian Hammer at 1300. Upgrades run through the same keep, so bank your smithing stones rather than spreading them across four weapons you are still auditioning. Tarforge in Mortal Shell 2: Unlock Items, Materials and Upgrade Order covers which item switches the weapon bench on and what the smelting function refunds when an experiment goes wrong.
The Iconoclast

You receive the Iconoclast in the prologue after the UnderMether encounter, once Harros the Vassal is equipped. It is a two-hander that swings light for its weight class, balanced enough to do nothing badly and nothing memorably. The same stretch of the prologue hands you the Naylshotte and the Untarnished Seal.
Plummet Strike is its ability. Eight Tarstones fit, with the Shrike Stone turning it into a ground slam that throws out a shockwave and the Parasitic Stone stacking Leech on kills. Some players never put it down, which says more about consistency than power.
Axe & Dagger

The Shrine of Trials is a chapel dungeon in Mushroom Village, near the Grisha Hunter merchant and close to the village beacon. The Chapel Key comes first, and guides disagree on where it sits. The most precise version puts it at the bonfire ringed by hag enemies, where one archway is an illusion and leads through to the monument holding the key.
Three rooms separate the door from the weapon. Face the king pillar and walk backwards to dissolve a false wall, strike the stone blocks onto both pressure plates, then kill the Armored Knight guarding the last room. Deadly Flurry, nine Tarstones, with Magdalena's Memento for a spiralling attack that clears anything surrounding you.
Veteran's Battle Axe

The King's Crypt sits in the Blackridge Cliffs of Fainweald. Reach the Blackridge Pass Beacon, follow the path beside it up to the Shattered Beacon where Proxima the Broodseeker unlocks, then look behind that beacon for the dungeon waiting below.
The drop is survivable, so take it rather than circling. Clear the cavern and open the sarcophagus at the far end. Eight Tarstones fit, and two matter: the Inflamed Clawstone adds Burn, and the Lost Clotstone lets you hurl the axe outright, creating distance and occasionally sending an enemy off a cliff.
Great Martyr's Blade

Martyr's Prison sits in Gloomshade Grove, inside the Citadel of Penance area. From the Stonebled Gate Beacon in the Sanguine Caverns, cross the main bridge into the grove and take the right-hand cave. Follow the single path until you hit an area with a well and a dungeon entrance.
Kill the Bloodcursed Lithopod near the Gloomshade Grove beacon first, since it drops the item that opens the citadel for good. Inside the prison, a mysterious coin pouch teleports you into the cell block, and the blade waits past the corridors. Spiral Surge, nine Tarstones, with the Clerik's Stone adding a heavy combo finisher and the Warden's Stone infusing Frost.
Obsidian Hammer

The Obsidianite Mines sit at the bottom of the central circular area in the Deserted Slums of Mammon. From the Abandoned Outpost Beacon, head south through the ruined town toward the Gate of Mammon, watching for Tarblighted Miner enemies. At the lowest level, obsidian slabs poke out of huge puddles and a small cave hides the entrance.
Getting down means falling ledge to ledge through a chasm. The Prophet of Profane Infinities waits at the bottom, a scaled-up Faceless Clerik who telegraphs his big swing and then hammers the ground with an unblockable follow-up. Heavy Stomps, twelve Tarstones, and the only weapon that accepts the Colossus Stone.
Axatana

Begin at the Castigator's Keep Beacon. Head down the hill, clear the Parasited Soldiers, follow the wooden platforms to the fork, cross the bridge, and put out the Blue Flame before engaging the enemies around it. The Bone Gate there drops you into the Vestige of Infinity, where a Launch Pad throws you to the top of the mountain.
Take the path down to your left, drop into the pocket holding Hoodmen and Prophet Hammers, and loot the Colossus Stone chest. One more Bone Gate opens the Forgotten Tower. Shoot the bell to rebuild the bridge, cross it, drop past the Muradean Tome chest, and press the button to open the gate on the dual-blade enemy holding the weapon. I still rate this route above every other pickup in the game, because it is a traversal puzzle instead of another arena.
Black Needle

Sester's Bastion opens when you cleanse the Sester's Gate Beacon, and cleansing it is mandatory to reach the Corrupted Gate beyond, so the weapon costs you no extra detour.
Shoot the bells inside to materialise the ledges you need. The arena at the end triggers the Twin Sesters, one with a crossbow and one in red with a rapier. Kill the crossbow user first and watch the red sester's stance, because she parries and hits hard. A third sester carrying the spear appears afterwards under the name Stray Sesters, and she drops it. Needle Storm, twelve Tarstones, and the Nightgrasp Stone belongs to this weapon alone.
Clockwork Scythe

Sariel, the Endless guards the scythe in the Chamber of Becoming, a dungeon near the Silent Steps Beacon in Mammon. Take the Bone Gate from the beacon to the brutalist structure and fight him at its central extension, then explore the stairs behind the large statue for the dungeon entrance.
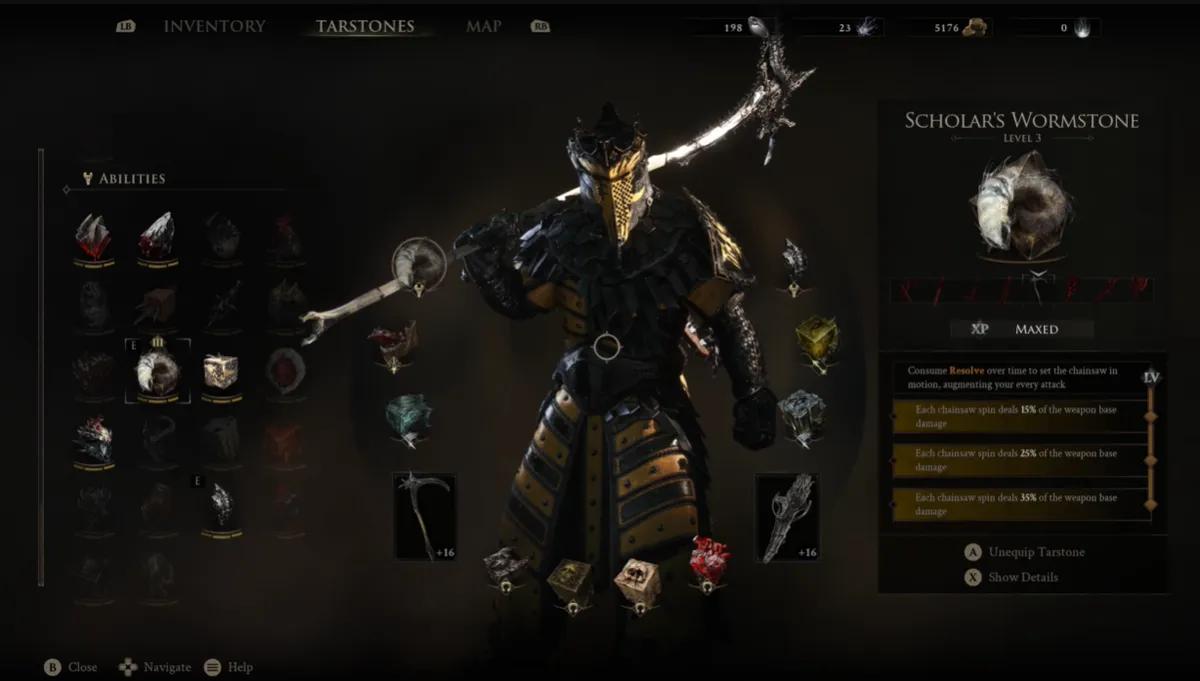
Inside he refuses to die properly. A sigil on the floor is ringed by four stones, and until they break he resurrects every time his health empties. Smash them and he unlocks as a Shell alongside the weapon. Clockwork Chainsaw, twelve Tarstones, with the Clockwork Shardstone making it spin. Its long running animations make dodging awkward, so treat it as a crowd tool.
Choosing a Weapon That Fits Your Build
Pick by whatever keeps killing you rather than by tier. Packs point toward the Axe & Dagger, the Axatana, or the Scythe's wide arcs. Single elites that punish one bad swing point toward the Battle Axe or the Great Martyr's Blade, where one stagger buys the entire opening. Tarstone pool matters more than it appears, because the twelve-stone weapons can be rebuilt into something else fifteen hours later without a new pickup. I would still skip the Clockwork Scythe map on a first run, since 3000 coins funds a lot of Tarforge levels for something you already trust.


 Det har lyckligt kopierats... Tack för att du delar vårt innehåll!:



5% insättningsbonus upp till 100 ädelstenar

0% avgifter på insättningar och uttag.





11% insättningsbonus + FreeSpin


EXTRA 10% INSÄTTNINGSBONUS + GRATIS 2 HJULSPINN

Gratis case och 100% välkomstbonus


5 gratisfodral, daglig gratis & bonus

3 gratis casinos och en bonus på 5% på alla kontantinsättningar.

+5% till insättning




Kommentarer