



Kontrollresonant Varje hund har sin dag: Alla hund- och leksaksplatser










 Xbox
Xbox Steam
Steam PlayStation
Every Dog Has Her Day is the quest that ends with Dylan Faden adopting a pet, and getting there means finding seven Mysterious Dogs scattered across every zone in Control Resonant and returning the toy each of them has lost. A few turn up while you are doing something else. The rest are tucked into corners that need most of your traversal kit, and one rule about carrying the toys makes the return trip harder than the search.
Every Dog Has Her Day Quest Overview
Type | Side Story |
Zones | All seven |
Dogs | Seven, one per zone |
Requirement | Shift for four of the seven |
Trophy | Dog's Best Friend |
Rewards | Untapped Trusted Spanner recipe, a pet |
The full campaign order across all three quest chains sits in the Control Resonant Walkthrough Hub.
Three Rules That Make This Quest Easier
The dog tells you where she is. Get anywhere near one and you will hear her whimper. If you know roughly which block to search, sound closes the gap faster than looking does.
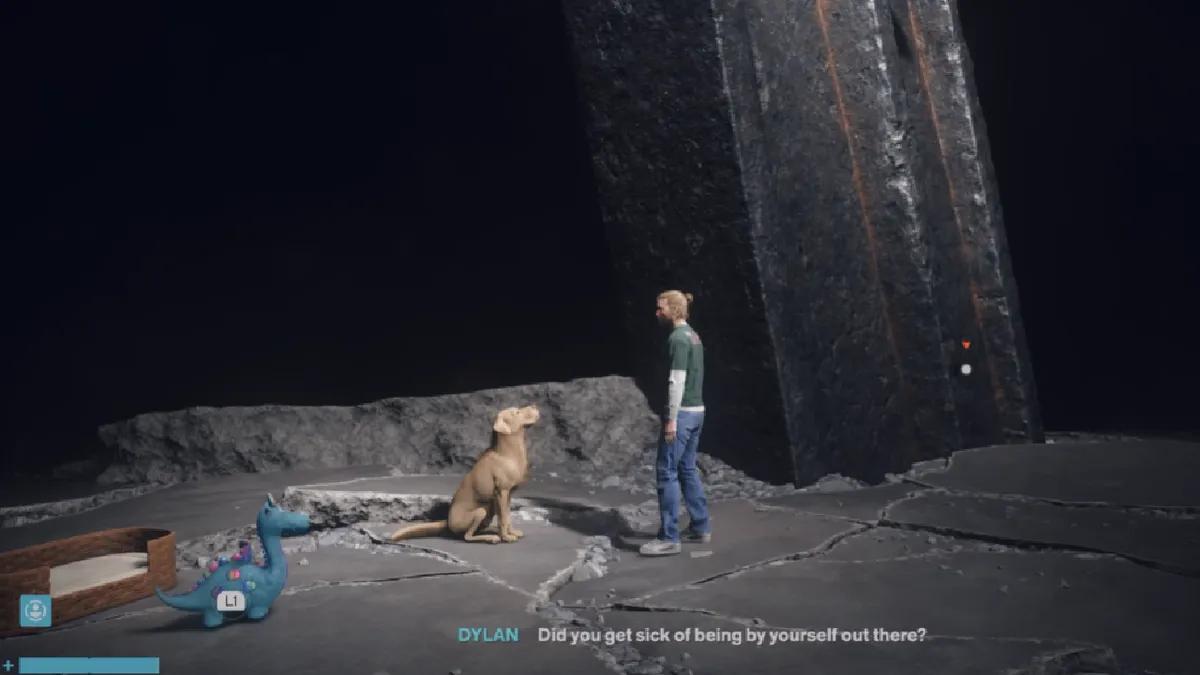
The toy is always the same and always in the same kind of place. It is a teal dinosaur, and it always sits under a Chowtrap advertisement, the boards with pictures of pets on them. Once you have found the dog, scan for a Chowtrap board rather than for the toy itself.
Reach does not work while carrying a toy. This is the rule that catches everyone. You can still vault over ledges and use Shift normally, but the grapple is off, which means the route to the toy is almost never the route back. Expect to get there with Reach and come back with some combination of Elevate, Shift, air dashing and climbing.
Picking up the first toy is what adds the quest to your log, so the Downtown dog usually starts it whether you meant to or not.
Downtown Dog and Toy

The dog is on top of a building at the north end of the street heading down from the Oldest House. This is the one most players find first, because it is directly on the route out of the opening area.

The toy is easy. Facing the dog, look left for a building with a Chowtrap advertisement board on it. Use Elevate to hover across, pick up the dinosaur, then use the building adjacent to the dog to climb back up and drop the toy in her bed.
Central Dog and Toy

The dog is on top of a building next to East Park Station, an area you will recognise if you have finished Control Resonant Power Lines Walkthrough.

The toy is directly opposite her, down in an alley that has both lasers and Hiss in it. Use Elevate to hover over the hazards and land next to the dinosaur, then pick it up and climb the nearby ledges to get back to higher ground.
Evacuation Zone Dog and Toy

From here on you want Shift, which comes from the Incursion Fault. The remaining four dogs all use it.

The dog is north of the Sinkhole, at the end of the street connecting to the Survivalist's Apartment from Control Resonant Urban Survival Walkthrough.
Getting to her takes a chain. Use Reach to zip to the top of the building, then double jump into Elevate and into Shift to align Dylan with the surface of the inverted building. She is directly in front of you once you land.

The toy is on top of the building above, to the left as you face the dog. Get onto the structure directly behind her, then use Elevate into Shift to align back onto the normal rooftop. Grab the toy and run the same sequence in reverse.
West Incursion Zone Dog and Toy
The dog is in the northwest corner of the map, west of the Parking Garage. That is the same garage you went through for the Incursion Fault, so the area should be familiar.
Step under the large Parking Garage sign and she is visible on top of an inverted building across the street.
The toy is unusually close. It sits on top of two outdoor AC units directly west of the inverted building. Grab it, then use Shift to align yourself with the building and drop it in her bed.
The Park Dog and Toy

The dog is in the northeast corner of the zone, directly north of Underhill's Apartment from Control Resonant New Growth Walkthrough.

She is easy to reach. The toy is not, because it sits on top of a building that can only be reached by powering a lift.

How to power the lift:
- Clear the mold enemies from the rooftop area with a small room containing two empty batteries
- Head to the pillar with charged batteries across the street and take a charge into the Aberrant
- Return to the room with the empty batteries and store the charge in one of them
- Take the charge back out and carry it to the lift
- Hit the empty battery next to the lift controls to power it up
- Press the button to call the lift down, then ride it to the top of the building
Grab the toy up there and use Elevate to drop safely back down beside the dog.
Underpass Dog and Toy

This is the hardest of the seven, both to reach and to return from.

The dog is directly north of the Research Site, which you may have visited during the Recursions and Iterations story mission.

Start from the Research Site building. The connecting structure next to it has yellow tape markings on it and can be climbed.

From the top of that structure, use Elevate to reach the red-carpet pathway and use Shift the moment you touch it to align Dylan. Run across the path, then Shift again to reach the top of the structure. From there, walk across the grey structure and chain Elevate into Reach to get onto the nearby building where the dog is.

The toy is directly above her, on an inverted surface, which is the whole problem.

Take the pathway northwest of the dog that goes around the building structure. When you reach a point where Dylan can touch the floor directly above him, use Shift to align to it. Move in the direction of the dog and take a right turn, which puts you in the area with the toy.

Getting back is the interesting part. Drop into the hole next to the toy. On the floor below, jump across to the next platform and Dylan reverts to the normal perspective automatically. Drop down the hole again and you are back at the bed.
Unknown Dog and Toy

The dog is on the floating cityscape to the left of the Patterned Field Office. Reaching that cityscape takes a short platforming run, after which she is sitting on a patio on top of one of the buildings.

The toy is on top of the white building directly opposite her, identifiable by the Bar's sign on the roof.

Start from the path with the billboard on it. At the end of that path, use Shift to walk across the vertical rooftop. Keep going across and get onto the elevated platform, then double jump and Elevate to reach the white building's terrace, using Shift immediately on arrival to align to it.

Walk across the terrace and grab the toy. Getting down is the quick part: jump forward off the building and let gravity do it. Then place the toy in the bed.
A Note on Coverage
Three of the routes above were originally documented against marked screenshots rather than described in words: the lift sequence for The Park toy, the starting point for the platforming run to the Unknown cityscape, and which specific building to cross in the Unknown. The steps are correct, but for those three you may need to orient visually on arrival rather than following a precise line.
How to Finish the Quest

Finding all seven toys is not the last step, and this is where people assume the quest is bugged.
Once every dog has her toy back, teleport into the Gap from any safe spot. The Mysterious Dog is there waiting. Interact with her to complete Notes: Every Dog Has Her Day and unlock the Dog's Best Friend trophy.
You also receive the Untapped Trusted Spanner Artifact, which arrives as a recipe and has to be crafted before you can use it.
Common Mistakes
Trying to Reach back to the dog with the toy in hand. The grapple is disabled while carrying. Plan the return route before you pick it up.
Looking for the toy instead of the advertisement. Every toy sits under a Chowtrap board. Find the board, find the toy.
Attempting the last four before Shift. The Evacuation Zone, West Incursion, Underpass and Unknown dogs all sit on inverted surfaces.
Stopping at seven toys. The quest completes in the Gap, not in the field.
Leaving the Spanner uncrafted. Like the rest of the Untapped line, the recipe does nothing until it is made.
What to Do Next
This quest spans every zone, which makes it a natural companion to the other collection chain. Control Resonant Unsupervised Science Walkthrough covers six testing facilities across the same map and is worth running alongside it.
For the zone maps that make both considerably faster, Control Resonant Notes: Mapping the New New York Walkthrough covers every Mapping Pylon and Sensor in the game.


 Det har lyckligt kopierats... Tack för att du delar vårt innehåll!:



5% insättningsbonus upp till 100 ädelstenar

0% avgifter på insättningar och uttag.





11% insättningsbonus + FreeSpin


EXTRA 10% INSÄTTNINGSBONUS + GRATIS 2 HJULSPINN

Gratis case och 100% välkomstbonus


5 gratisfodral, daglig gratis & bonus

3 gratis casinos och en bonus på 5% på alla kontantinsättningar.

+5% till insättning




Kommentarer